Posted on 1 Comment

How To Add Size To Product In WooCommerce

woocommerce variable product

If you are selling clothing, you may have to deal with product’s variation. One T-Shirt may have more than one size, color… In WooCommerce, such products are called variable products (since they have more than one variation).

So, how to add size to product in WooCommerce?

Understand product variations

When a product has multiple attributes (such as color: red, black, size: S, M, L) we usually don’t create different product for each variation but instead we create a product with variations.

For example, you want to sell a t-shirt with sizes S, M, L, you only need to create one product and add three variations S, M and L.

When your customers go to your store to make the purchase on this product, they must select a single variation before adding to cart.

How to add size to product in WooCommerce

From the understanding of variation product, you can guess that we are going to create an attribute called size and assign the desired values to them. In this example, I’m going to add three sizes: S (small), M (medium) and L (large) or a T-Shirt product.

Adding size attribute

Let’s go to Products->Attribute in your dashboard:
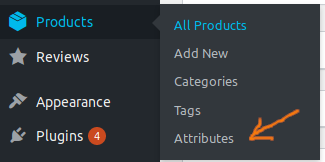
start creating attributes on WooCommerce

Now, in the new screen, enter the following details to start creating the size attribute:
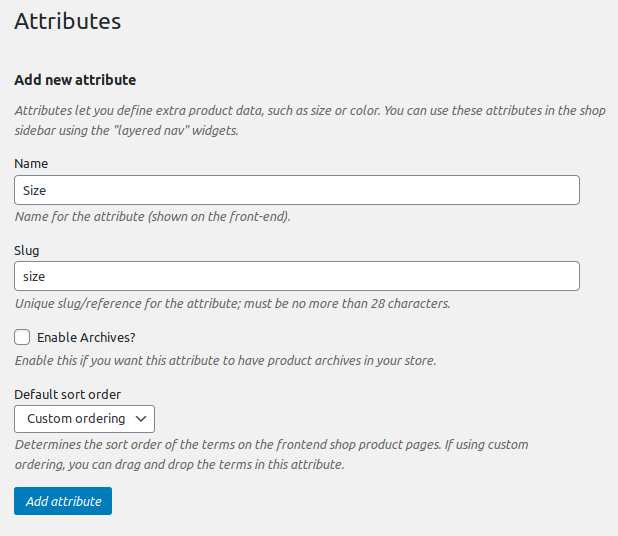
Create woocommerce attributes

Click on add attribute button to save the configuration. Now, you have a “Size” attribute.

It’s time to add the specific variations to this attribute.

After clicking on “Add attribute” button, the attribute is create and you see it appears on the right:

start configure variation for size attribute

Let’s click on configure terms to start adding specific sizes.
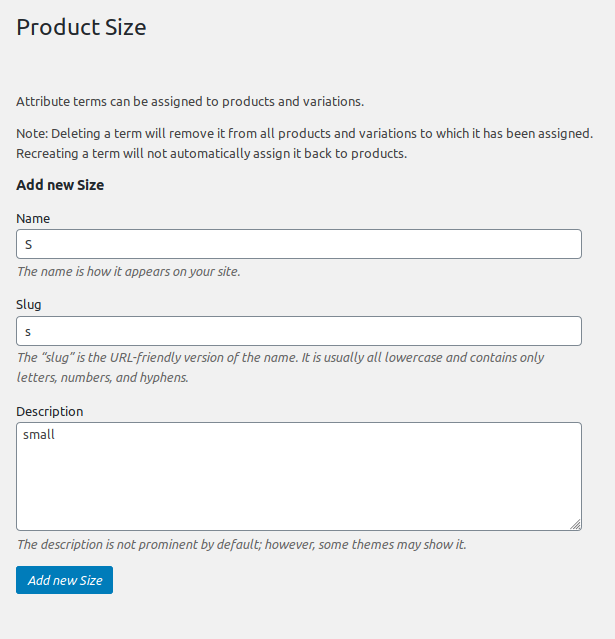
adding terms to attribute

As you can see here, there is a form for us to enter the details of a possible variation. Let’s go ahead and add all the variations (S, M, L) by entering the details and click on “Add new Size” button.

Finally, we have three variations listed on the right like so:

How To Add Size To Product In WooCommerce 1

Now, we are ready to add those sizes to the T-Shirt product.

Adding Size Variations To T-Shirt product

Let’s start by going to Products->Add new. In the new window, let’s scroll down to “Product data” and select the product type to “Variable Product”:

How To Add Size To Product In WooCommerce 2

Now, let’s go to “Attribute tab” and in the only drop down in that that, select Size and click on “Add”:
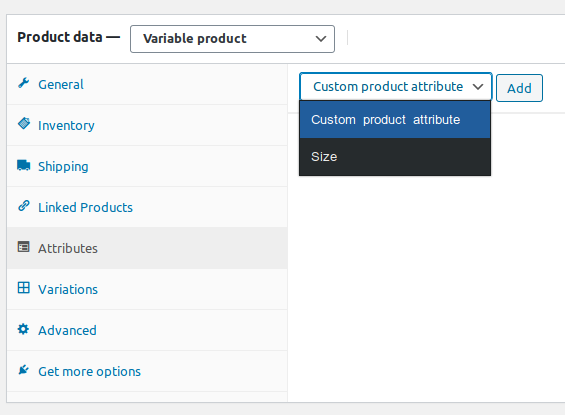
Select size attribute and add to the product

You’ll see that new fields appear. Let’s click on “Select term” input box and select all the variations we want for our product. You don’t have to add all of them. However, in this case, I’ll add all three by clicking on them.
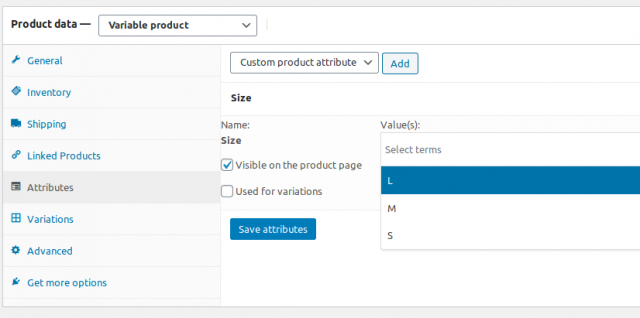
add all possible variation to the product

Then, make sure you check the “Used for variations” checkbox and finally, click on Save attributes to complete the tasks we need to do on this tab.
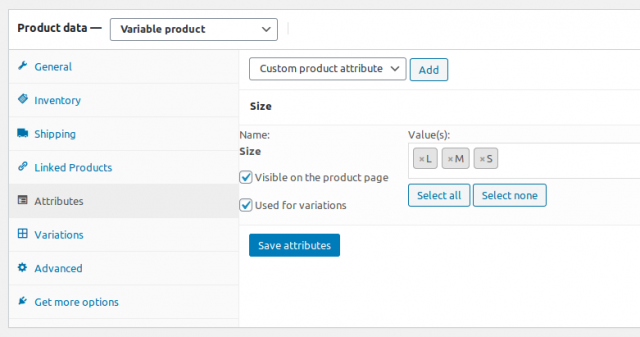
added all variations

The next step would be click on “Variations” tab, click on the only select box in that tab and select “Create variations from all attributes”
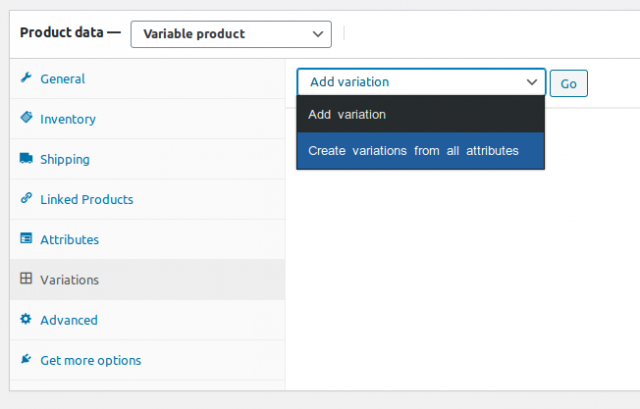
create variations from all attributes

After clicking on “Go”, there will be a dialog box appears to confirm the creation of variations. Let’s click on OK and you’ll see all the size variations are created:
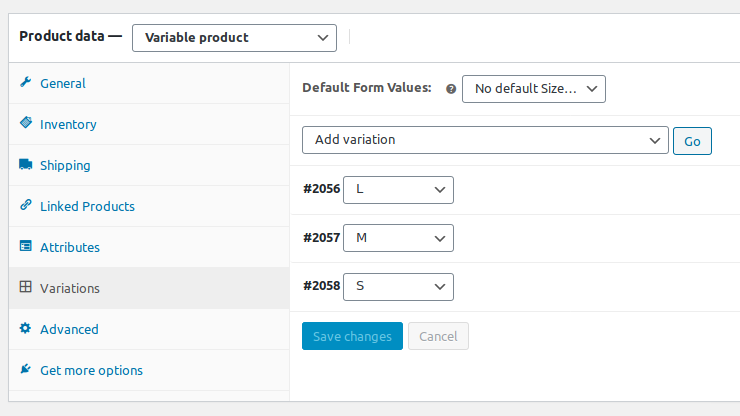
size variations added

Now, it’s time to configure specific properties for each variation. When you click on each variation, you’ll see a new tab appears:
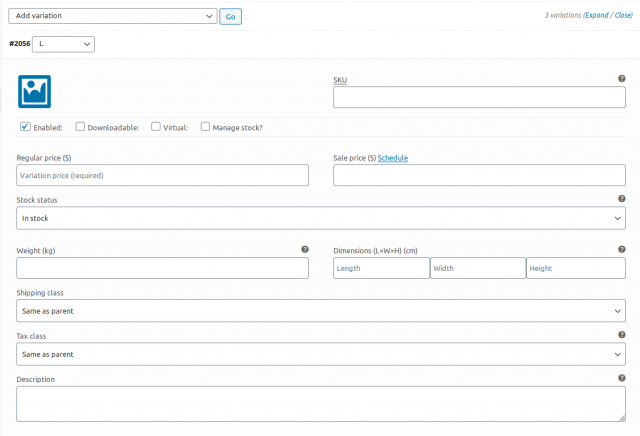
configure specific properties for size variations

You can see that, there are a lot of fields for you to enter specific properties for each size variation. For example, you can set the variation own price and sale price. Since we are adding sizes, you can specify the dimension of each product here.

I’m going to add some images to the variations and set different prices.

Finally, let’s save all changes and publish the product.

View the different product sizes as customers

Let’s view the product on our store:
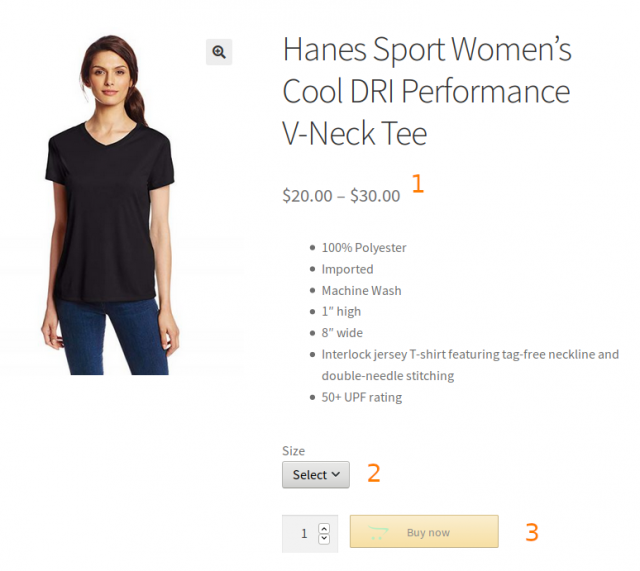
how to add size to products in WooCommerce

As you can see, this product display is different from normal product:

  1. It has variable price. The price is ranging from the lowest to highest priced variation. Since my product has three size variations which costs from $20 to $30, the price is shown as $20 – $30.
  2. There is a select box for customer to pick the size.
  3. The buy now (add to cart button) is greyed out if the customer hasn’t picked a variation.

Conclusion

There you have it! You now now how to add size to products in WooCommerce. This is the power of variable products. It doesn’t limit you to add just sizes, you can add colors, weight… variations to your products too.

If you have any questions, simply leave a comment below.
Posted on Leave a comment

How To Add Multiple Images For WooCommerce Product Variations

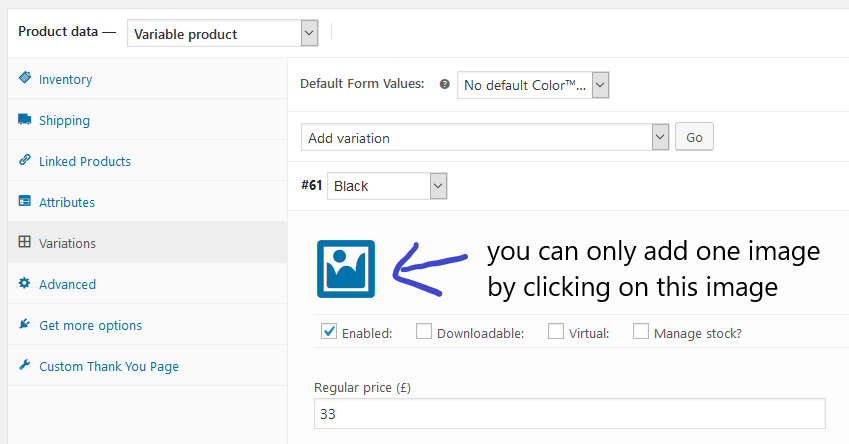
One of the most hard to understand limitation of WooCommerce is the number of a images you can have for product variations. One variation can have only one image:

How To Add Multiple Images For WooCommerce Product Variations 3

What if you want to add more images to the variation? Well, bad news is you cannot do that with WooCoomerce’s default functionalities. However, the good news is there is a plugin that let you add up to 2 images for products’ variations (if you are using the free version). If you have the pro version of this plugin, you can add as many images as you want.

Add Unlimited product images to WooCommerce variations using plugin

The plugin we are going to use to day is Additional Variation Images Gallery for WooCommerce. You can download it for free here on WordPress.org

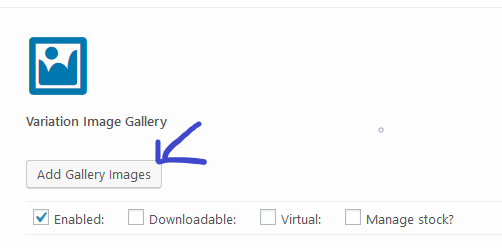
After installing and activating the plugin. You’ll see the effects right away. Let’s go to one of my variable product and open the variations tab. Click on one variation and you’ll see that there is a new button under the default image place holder:

new button to add more images to woocommerce product variation

Now, let me add some images to this product. You need to add the images one by one though. I think it would be more convenient to have the ability to add more than one image at a time.

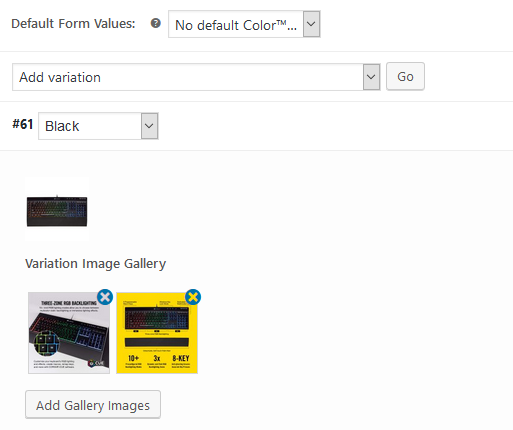
added images for product variations

As you can see, my product has a “Black” variation and I was able to add 3 images to this one (one supported by WooCommerce and two others I added through the Add Gallery Images button).

Now, let’s view our product:

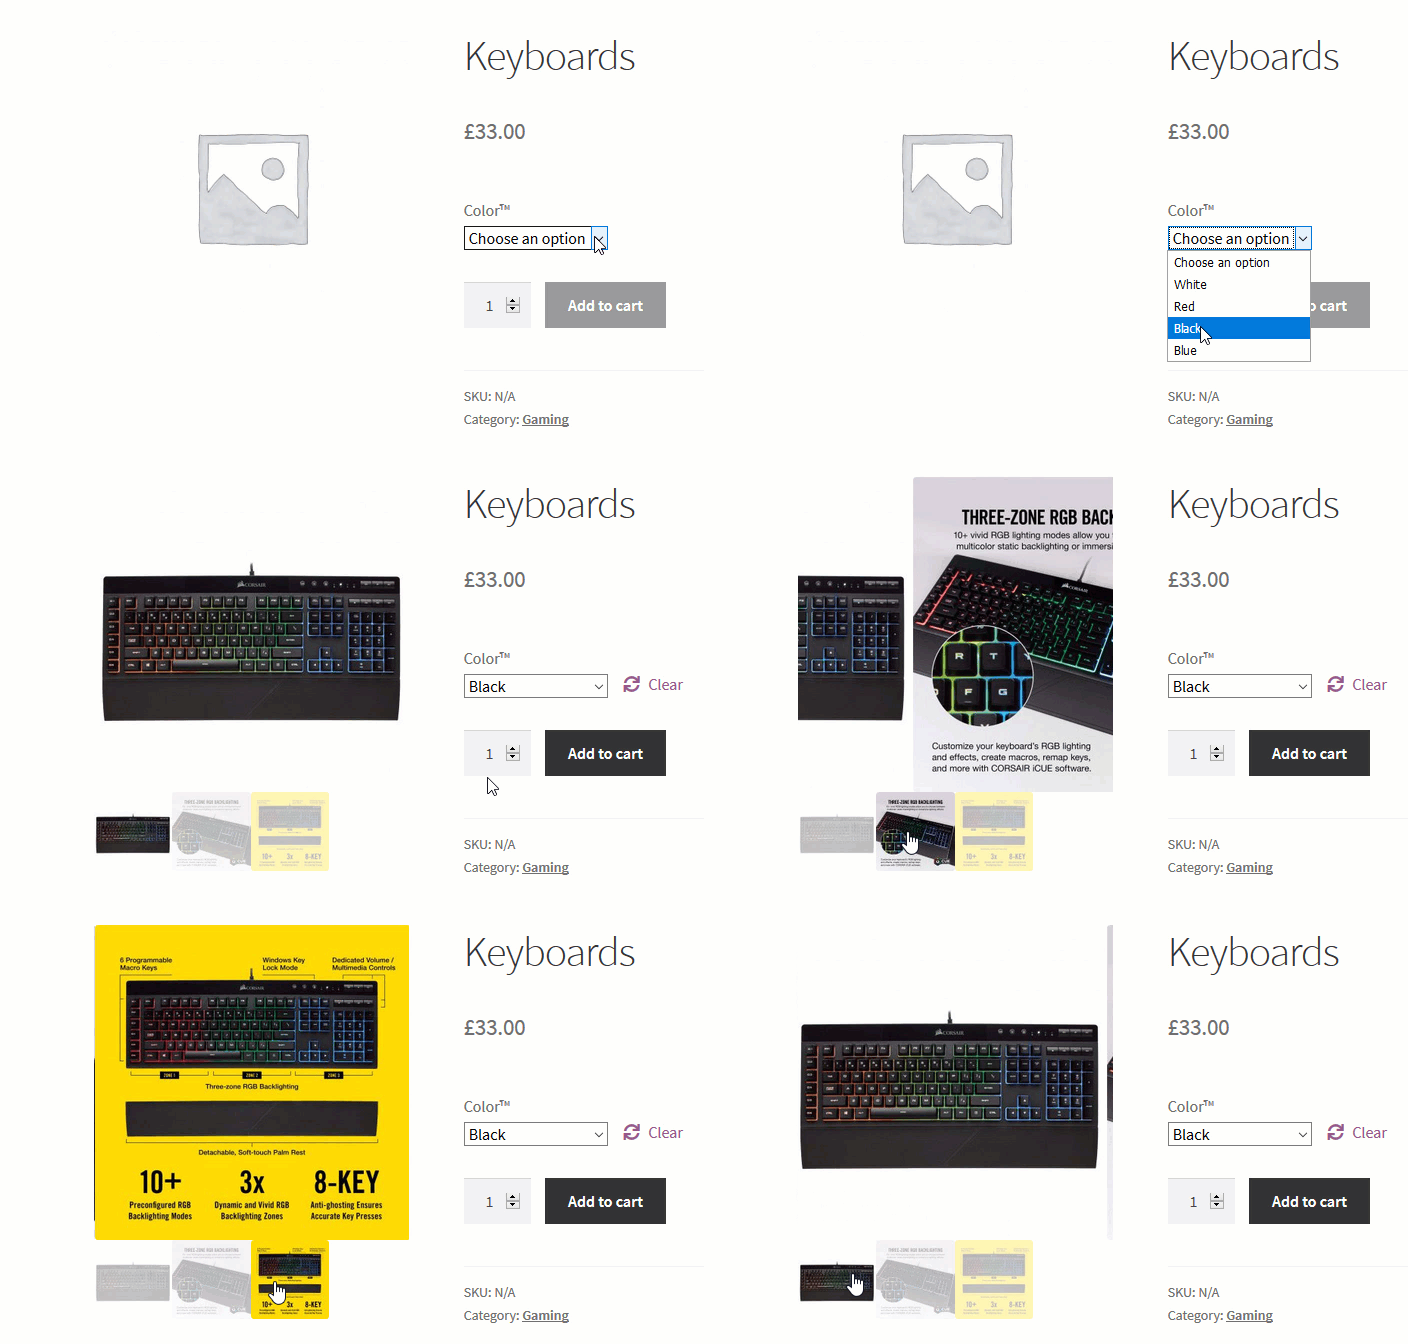
product variation now has multiple images

As you can see, as soon as changed the color option to Black, I can see the list of images available to that variation. You can add more images to all of your variations.

Some additional settings

I’m not sure about you but I’m pretty happy with the result up to now. However, the plugin offers more options for you to customize in case you have some specific needs. Let’s go to WooCommerce->Settings and you’ll see there is a new tab called WooCommerce Variation Gallery:

new tab to customize variation gallery

All the options are quite self explanatory. If the image slider on the product page is working good for you, then you should not change anything here.


Conclusion

This is a very nice plugin to have when you have variable product. The limit one image per variation of WooCommerce is quite limited and in most cases, isn’t enough for store owners. This plugin (free version) allows us to add two more images to the product’s variation. This should be enough for most store. If you need more images, consider upgrading to support the developer. 

Posted on Leave a comment

WooCommerce Product Attributes Q&A – The Ultimate Guide

WooCommerce Product Attributes Q&A - The Ultimate Guide 4

What are WooCommerce Product Attributes?

WooCommerce Products Attributes, as the name suggested, are the attributes that products in WooCommerce can have. One product can have multiple attributes as well as many products can share one attribute. Take color as an example. Color could be an attribute of any product. If you sell head phones, your products’ colors could be red, white, black…

Product Attributes vs Product Categories

Sometimes you may wonder, what are differences between product attributes and product categories. The rule of thumb is when if an attribute is distinctive enough, you should make it a category. Attributes are things that products HAVE, categories are groups that products BELONG to. If you sell headphones only and your store only have red, blue, pink headphones then you can categories your headphones according to their colors. If you sell other products too, making color as category doesn’t make much sense. However, the decision is yours.

What are global attributes and product specific attributes

In WooCommerce, there are two ways you can add attributes to your products. Either you go to Product->attributes or in the product edit page, you go to Product Data->Attributes to add new attributes. However, if you choose the first method, you will create global attributes, which means the attributes you created in Product->Attributes are available to all other products. If you choose to go to the product edit page->Product data->attributes, you can create attributes that are available to that specific product only.

So, when you create a global attribute and when to create a product-specific attribute. This is your call. If one attribute is shared among two or more products, it makes senses to make it as global attribute. However, if one attribute that is possessed by only one product, it’s best to make it product-specific.

How to add global attributes in WooCommerce

Creating global attributes is quite simple with WooCommerce. Let’s create an attribute called Color in my store.

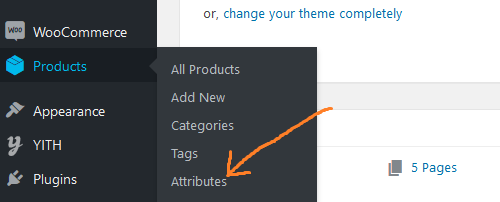
  1. In your site’s dashboard, let’s go to Products->Attributes:

go to products then attributes

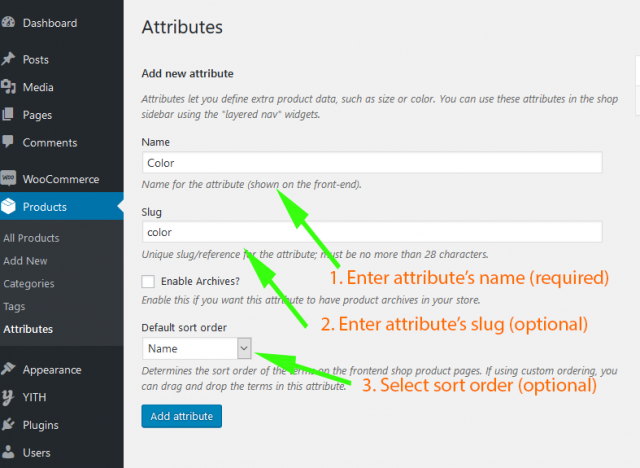
Now, we are in add attributes screen. You can see that it’s very similar to add post’s categories screen:

WooCommerce Product Attributes Q&A - The Ultimate Guide 5

There are a few fields here you need to pay attention to:

  1. Name field: This field is required. This is the attribute’s name, in our case is color. This name is visible to your end users so you should make this one user friendly.
  2. Slug: This one could appear in your URL. You can specify this field or let WooCommerce does that for you based on your attribute’s name
  3. Enable archives: Do you want to have a page dedicated to list products that have this attribute? If so, check this box.
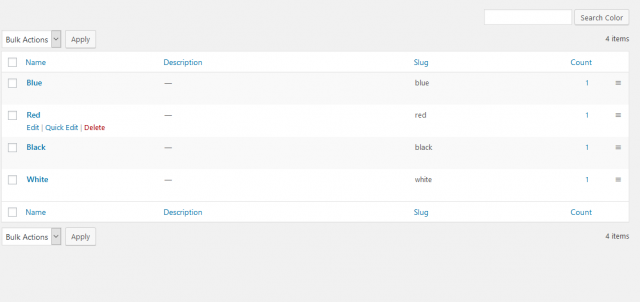
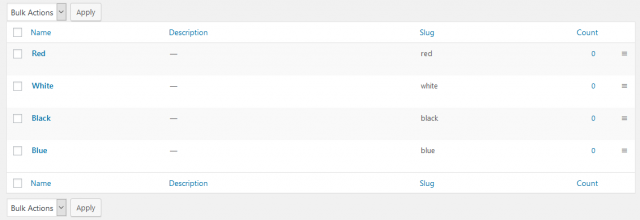
  4. Default sort order: What order you want the attributes to displayed in the product page? You can set the order by name (name numeric if the attributes are numbers) or by ID of the attribute. For example, I have 4 colors for the attribute color:

WooCommerce Product Attributes Q&A - The Ultimate Guide 6

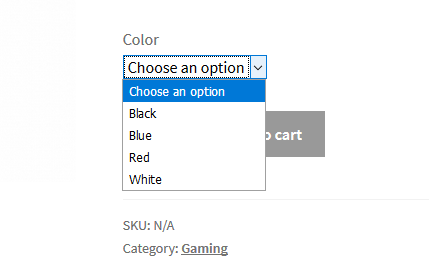
If I set the custom ordering to Name, here is what I see on the product page:

color attribute order on product page

As you can see, the colors are sorted alphabetically.

If you want to customize this order, you can select “Custom ordering”. I’ll show you more about custom ordering in the next section.

Now, let’s click on Add attribute to add the color attribute.

Adding terms for global attributes

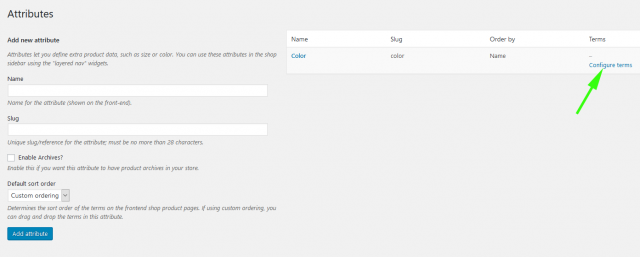
Now we have the attribute Color added. It’s time to add the values that it can hold. You can always add more value to your attributes later so you don’t have to add all values at once. In WooCommerce, attributes’ values are called terms. For example, our color attribute can  have Red, White, Blue, Black, Green terms.

Once you have the attribute added, you’ll see there is a link called “Configure terms” appears:

WooCommerce Product Attributes Q&A - The Ultimate Guide 7

Let’s click on that add add four “terms” for our attributes. They are Blue, Black, White, Red:

WooCommerce Product Attributes Q&A - The Ultimate Guide 8

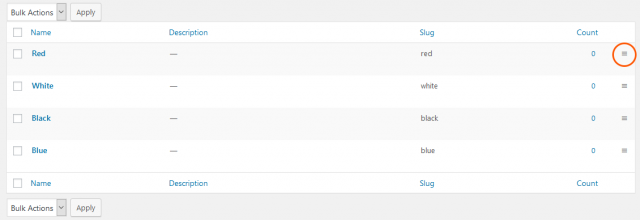
Now, let’s go back to talk about the custom ordering of attributes a bit more. As you can see, our terms are ordered by Name or by ID, if you want a different ordering, you need to set the Default sort order to Custom ordering. So, if you want to display the colors in the product page to White->Red->Black->Blue, you need to set the order on this page. Simply click and hold the hamburger icon and drag the items to your desired position:

attribute terms custom ordering

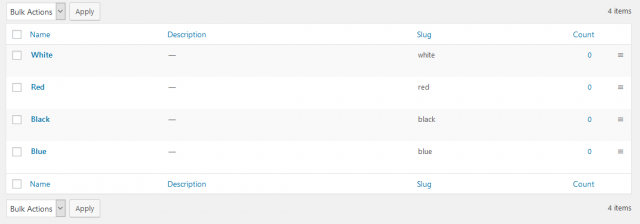
After a bit of dragging, here I have my terms in my desired order:

WooCommerce Product Attributes Q&A - The Ultimate Guide 9

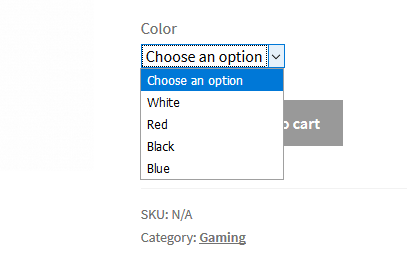
Now, if I view the product page, I’ll see the colors are ordered from White to Red to Black to Blue:

custom ordering of colors take effects

Adding a product-specific attribute

If your product has a special attribute that only it owns, it’s suitable to use the product-specific attribute. To add a product-specific attribute, simply click on Product data->Attributes:

go to product data then attributes

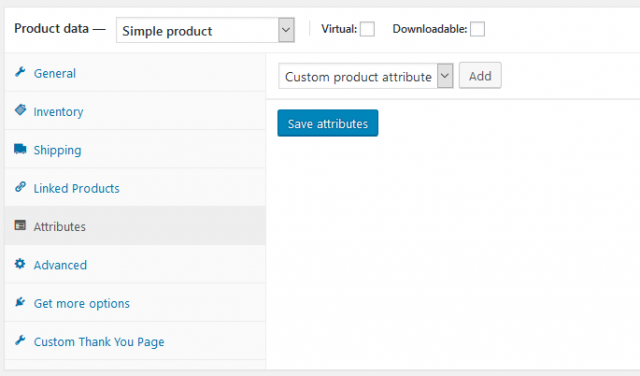
Now, in the select box, make sure you have “Custom product attribute” selected then click on “Add”. You’ll have a form to enter the attribute details. For example, I’m going to add an attribute called Size with the three possible values: Small, Medium, Large:

adding product-specific attributes

As you can see, I separated the terms (values) by the pipe (|) character. I can either select the attribute to be visible on the product page or not. Check the checkbox if you want to show this attribute on the product page.

If your product is a variable product, you will also see another checkbox “Used for variations”. Check this if you want to create variations based on this attribute.

Finally, click on Save attributes button to save the attribute.

WoCommerce Attributes FAQs

Below, you’ll find answers to some of most common questions regarding WooCommerce product attributes. If you don’t find your questions, feel free to ask.

What to do when WooCommerce stuck spinning ball when saving attributes?

This is usually caused by Javascript error. The best bet is to open the Developer Console (Right click, select inspect/inspect element) and click on Console tab to see the red messages (errors). This error could be the result of:

  1. Poorly coded theme, plugins
  2. Caching plugins that combine and minify Javascript files incorrectly.

You can also try changing your site theme (temporarily) to the Store Front theme from WooCommerce. If the error is gone, you could safely conclude that your theme is the culprit. Otherwise, try deactivating your plugins, one by one (but leave WooCommerce activated) to see which one is the cause of that error.

How To Add Special Symbols (Registered, Trademark…) To Product Attribute

Since WordPress supports Unicode, you can add many special characters to product attributes. In some cases, you may want to add the trademark symbol (™) to the attribute name. Simply copy this character and paste into the attribute’s name input box:

WooCommerce Product Attributes Q&A - The Ultimate Guide 10

Then, click on Update to save your changes.

Conclusion

WooCommerce product attributes offering more flexibility to your store. They also let your customer search, filter product by specific attributes such as color, size … There is no limit on how many or what kind of attribute you can use on your store.