
Contents
If you are selling clothing, you may have to deal with product’s variation. One T-Shirt may have more than one size, color… In WooCommerce, such products are called variable products (since they have more than one variation).
So, how to add size to product in WooCommerce?
Understand product variations
When a product has multiple attributes (such as color: red, black, size: S, M, L) we usually don’t create different product for each variation but instead we create a product with variations.
For example, you want to sell a t-shirt with sizes S, M, L, you only need to create one product and add three variations S, M and L.
When your customers go to your store to make the purchase on this product, they must select a single variation before adding to cart.
How to add size to product in WooCommerce
From the understanding of variation product, you can guess that we are going to create an attribute called size and assign the desired values to them. In this example, I’m going to add three sizes: S (small), M (medium) and L (large) or a T-Shirt product.
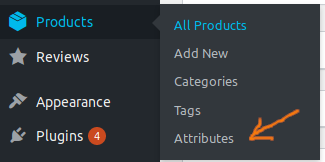
Adding size attribute
Let’s go to Products->Attribute in your dashboard:
Now, in the new screen, enter the following details to start creating the size attribute:
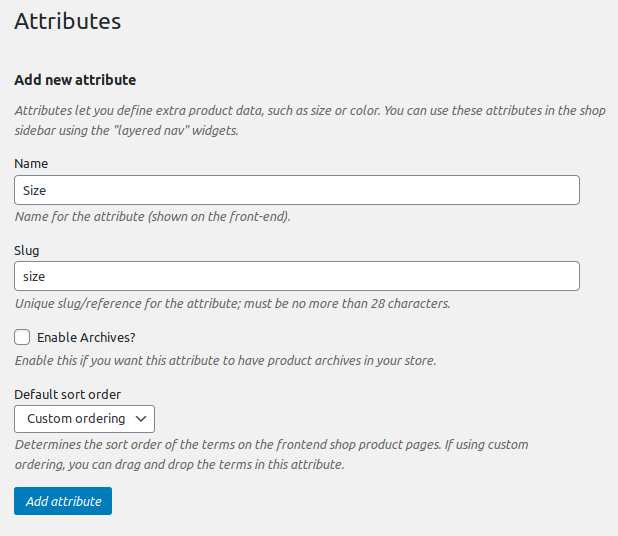
Click on add attribute button to save the configuration. Now, you have a “Size” attribute.
It’s time to add the specific variations to this attribute.
After clicking on “Add attribute” button, the attribute is create and you see it appears on the right:

Let’s click on configure terms to start adding specific sizes.
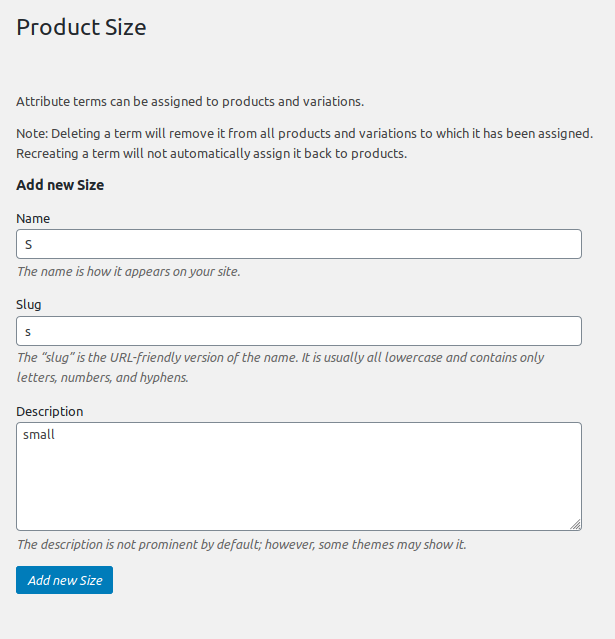
As you can see here, there is a form for us to enter the details of a possible variation. Let’s go ahead and add all the variations (S, M, L) by entering the details and click on “Add new Size” button.
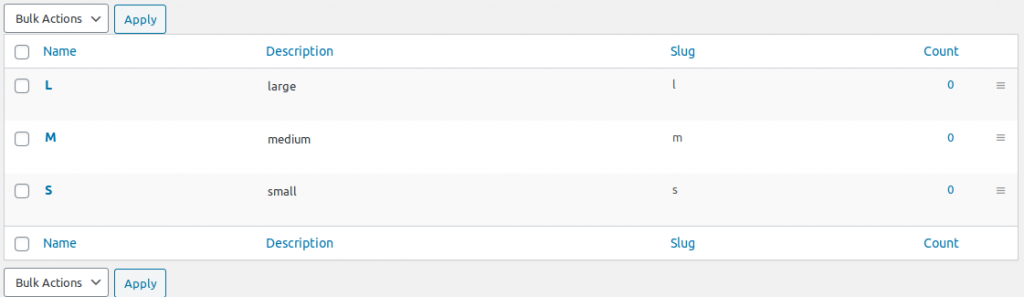
Finally, we have three variations listed on the right like so:
Now, we are ready to add those sizes to the T-Shirt product.
Adding Size Variations To T-Shirt product
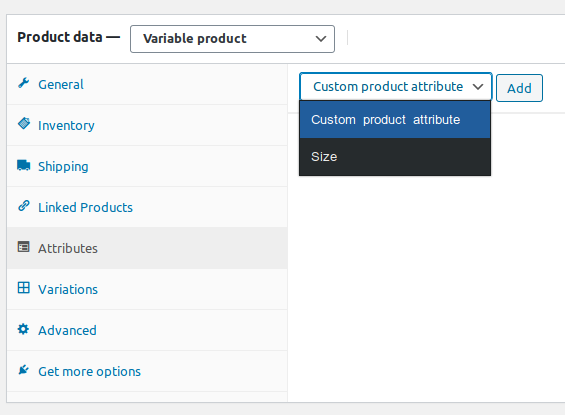
Let’s start by going to Products->Add new. In the new window, let’s scroll down to “Product data” and select the product type to “Variable Product”:

Now, let’s go to “Attribute tab” and in the only drop down in that that, select Size and click on “Add”:
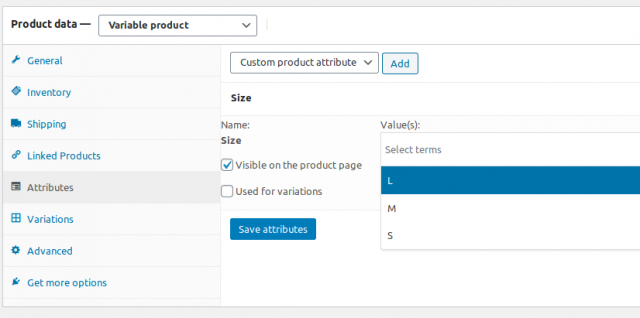
You’ll see that new fields appear. Let’s click on “Select term” input box and select all the variations we want for our product. You don’t have to add all of them. However, in this case, I’ll add all three by clicking on them.
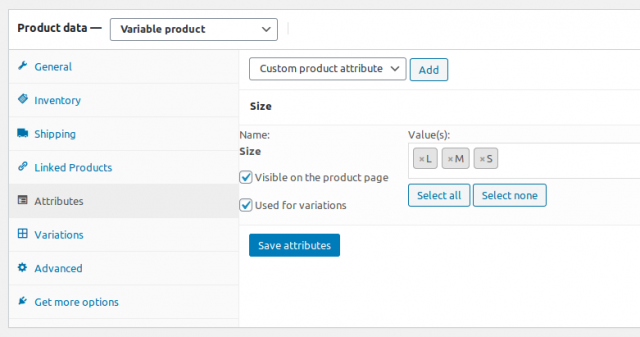
Then, make sure you check the “Used for variations” checkbox and finally, click on Save attributes to complete the tasks we need to do on this tab.
The next step would be click on “Variations” tab, click on the only select box in that tab and select “Create variations from all attributes”

After clicking on “Go”, there will be a dialog box appears to confirm the creation of variations. Let’s click on OK and you’ll see all the size variations are created:

Now, it’s time to configure specific properties for each variation. When you click on each variation, you’ll see a new tab appears:
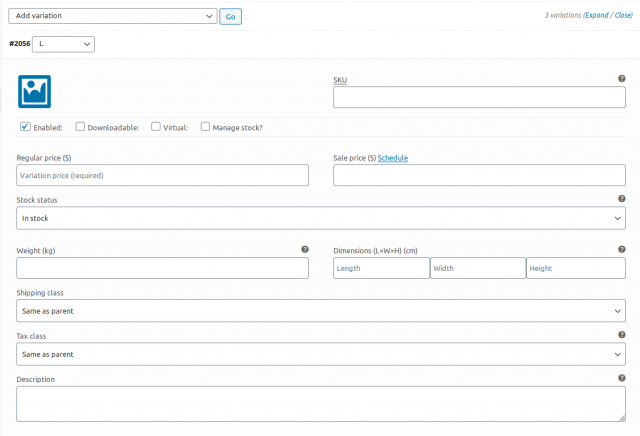
You can see that, there are a lot of fields for you to enter specific properties for each size variation. For example, you can set the variation own price and sale price. Since we are adding sizes, you can specify the dimension of each product here.
I’m going to add some images to the variations and set different prices.
Finally, let’s save all changes and publish the product.
View the different product sizes as customers
Let’s view the product on our store:
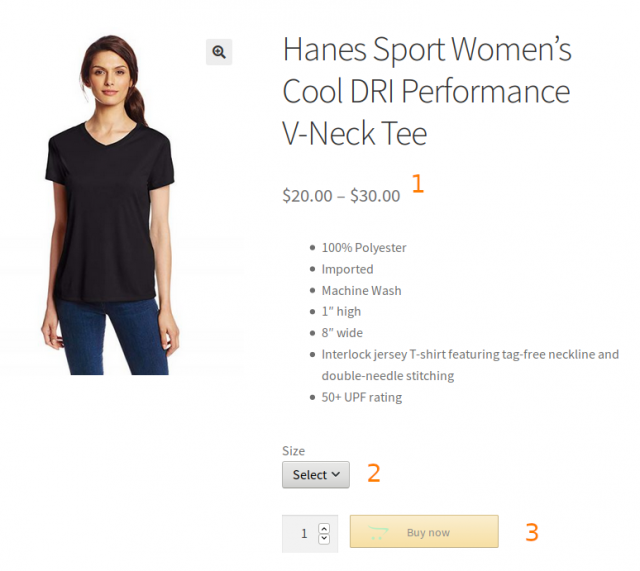
As you can see, this product display is different from normal product:
- It has variable price. The price is ranging from the lowest to highest priced variation. Since my product has three size variations which costs from $20 to $30, the price is shown as $20 – $30.
- There is a select box for customer to pick the size.
- The buy now (add to cart button) is greyed out if the customer hasn’t picked a variation.
Conclusion
There you have it! You now now how to add size to products in WooCommerce. This is the power of variable products. It doesn’t limit you to add just sizes, you can add colors, weight… variations to your products too.
If you have any questions, simply leave a comment below.


Works for me!! thanks a lot!!