
Contents
Nowadays, almost all WooCommerce theme has the support for the cart icon on menu. However, what if your theme doesn’t support WooCommerce extensively? What if it lacks the cart icon on the navigation menu? Don’t worry, you don’t have to change your theme. There is a plugin for that.
Here are the steps you need to do to get the cart icon on your navigation menu:
- Check if you have a menu created
- Check the location of your menu
- Install and activate WooCommerce Menubar cart plugin
- Add the cart icon to your navigation bar
Without further ado, let’s get started.
Creating a menu is one of the tasks that you do first when creating your site. However, speaking from my personal experience, many times I use the default menu that WordPress provides, that is the list of pages on my site. To be honest, sometimes it’s all I need. However, as we are going to display the cart icon on our navigation bar, we need to have at least one menu.
So, let’s go to Apperance->Menus:
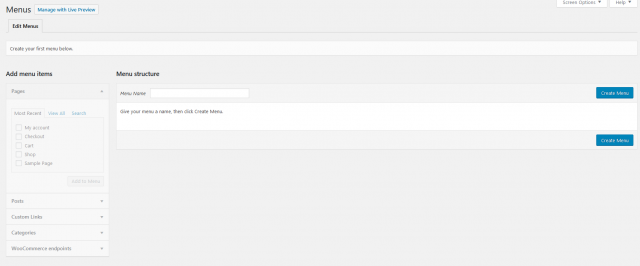
As you can see, I don’t have a menu on this site. So, let’s create one.
I’m going to quickly create a menu here so we can get on display the cart icon on my site’s navigation bar. So, I’ll enter the menu name and click on Create Menu:

Now I have a menu. You may think that we are done here with the menu. However, there are a few things we need to do. First, it’s to add some items to the menu. I’m going to add the Cart, Shop and Checkout page to the menu:
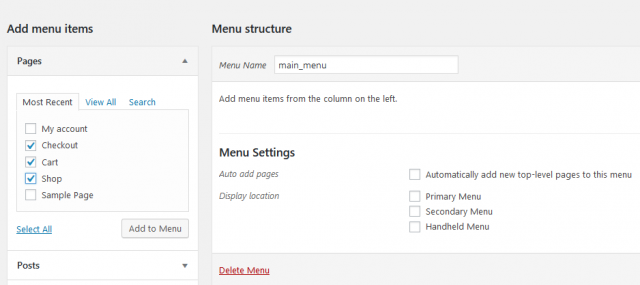
After clicking on Add to menu, I got my pages appears on the menu. Let’s click on Save menu to save the changes.
The last step is to set this menu to the top navigation position. Let’s click on Manage Locations. The number of navigation menu locations depends on the theme. As I’m using StoreFront, I have three locations as shown below.
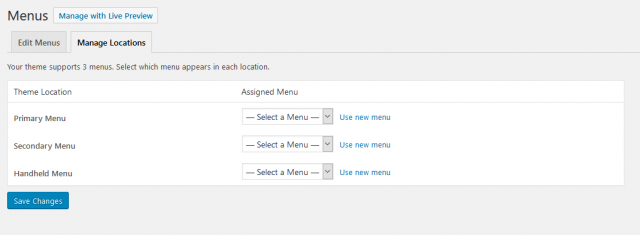
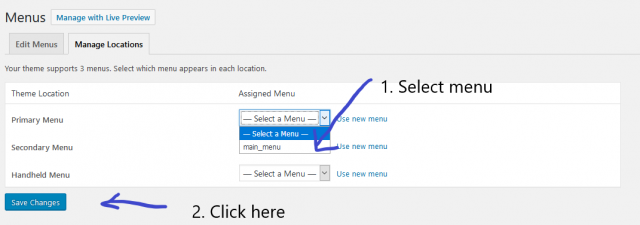
I want to set the menu to the Primary Menu location only. So I click on Select a Menu and select the menu I’ve just created. I click on Save changes when all is done.
Now, we are done with the menu. Let’s install the plugin to display the cart icon on the navigation menu of our site.
Install and activate BC Menu bar cart plugin
Now, it’s the to install the plugin I mentioned in the beginning of this post. It’s a free plugin on WordPress.org. You can download it from here
After activating the plugin, you’ll see it in the plugins list:
![]()
![]()
Now, let’s click on Get started to start creating the cart icon on your menu.
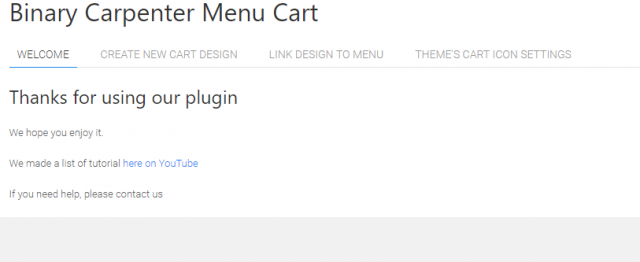
Start configuring the cart icon design
Now, click on the Create new cart design tab:
![]()
![]()
You can see there are quite many options. However, don’t be intimidated. I created this plugin to let you customize every bit of the cart icon on your navigation menu.
To create the cart icon on your navigation bar, you just need to set a few options.
Let me explain the way the plugin works really quickly.
In the previous section, you created a menu and assign it to specific location(s).
Now, with BC Menu bar cart icon, you will create designs (this is the cart icon design). Then, you can attach designs to menu.
As you can see, you can attach any design to any menu. This is one of the advantages of this plugin over other ones on the market. Most of other plugins only allow you attach a cart icon to a menu.
Design sections explained
So, let’s go ahead and create a design. Let me briefly introduce the options you can set on this page:
Section 1: Design title: this is the title of your design. It is similar to the title of a post. You can name it anything you like. Make sure it makes sense. For example, “cart icon design for main navigation menu” 0r “cart icon design for footer menu”.
Section 2. This section let you set the display rule for the cart. If you want to hide the cart icon when it is empty, uncheck the first checkbox. For the second checkbox, I always check it.
Section 3: Cart layout: Here you can select the layout of the cart icon. As you can see, we have 6 layouts for you to choose from. Let’s pick the one you like. “My cart replacement” is the alternative text for “My cart” on the design that have this text. Finally, you can set the cart icon to float left, right or center.
After selecting all the option, click on save changes to save the changes. You will see the page reload and new design created:
![]()
![]()
As you can see, all the options are saved and there is a shortcode created. You can put this shortcode anywhere to display the cart icon.
Now, the next step would be link this cart design to a menu. Let’s click on the “Link Design to menu” tab:
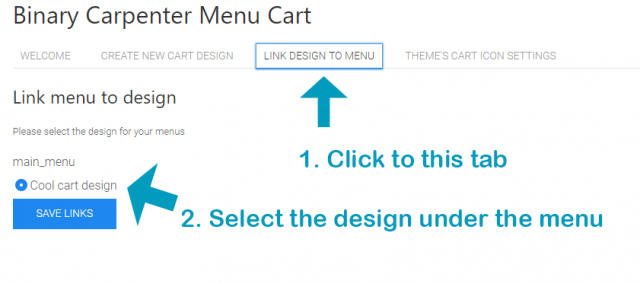
Now, since we only have one menu and one design, the choice would be obvious. However, when you have multiple designs and multiple menu, you’ll see a list of designs appears under the menu.
For now, select the design for the menu and click on Save links.
Now, you can open your site and see the cart icon appears on the navigation menu. Here is what it look like on my theme:
![]()
![]()
As you can see, the icon with items count and cart total appears on the menu. You may wonder:
- Can you change the cart icon color (blue/red… instead of black)?
- Is it possible to change the cart icon to something else
The answer for all the questions above is yes. I’ll leave it for you to discover in the plugin. You can download the BC Menu Cart Icon plugin here for free.
I also make a pro version, which let you customize the icon much further. You can also see the list of items in cart when you hover/click on the icon. You can find out more about the pro version here.
Conclusion
Adding a cart icon (with different designs, to include cart icon, cart total, cart item count…) to your navigation menu used to be a difficult task and required coding. However, with BC Menu Cart Icon, the problem is so simple to solve now. I hope you enjoy using the plugin as much as I enjoy creating it. If you have questions, don’t hesitate to send me a message or leave a comment below.
![[Tutorial] WooCommerce Customers Enter Price Amount (Name Your Price)](https://www.binarycarpenter.com/wp-content/uploads/2019/05/custom-pricing-150x150.jpg)


Can you be more specific as to how to add the shortcode to the website? “Put this shortcode anywhere to display the icon” is too vague for me. I created a text widget in my theme sidebar and added the shortcode to it, but all I see is the cart and a black dot. The cart and black dot showed up before I added the shortcode into the text widget and adding the code into the text widget didn’t have any effect. Please help.
Regards,
Bob
I’m going to make a video and send you via email.
Hi I was able to get it fixed. Works well Thanks.
Bob
Awesome, Robert.
May I know what was the problem and how did you fix it (if possible)?
Thanks!
Hi Dat
I deleted and recreated the design following your video on youtube. Worked perfectly. Still not sure what I did wrong the first time. All is good now.
R
Bob