Posted on Leave a comment

How To Display Posts As Grid Or As List In WordPress

How To Display Posts As Grid Or As List In WordPress 1

There are sometimes you want to list your posts or product is a single page. Maybe your visitors requests it, maybe you find it’s necessary. I myself feel the way WordPress’ display the posts are quite basic. What if I want to display posts in multiple columns, say 2, 3 or even 4 columns instead of one? What if I want to display the featured image in the post list? I couldn’t do that with WordPress’ native posts display. Luckily, there is a plugin can solve that problem.

Meet the plugin WP Show Posts

WP Show Posts is the plugin that let you customize the way your posts are listed. If you know WordPress, the term “post” isn’t limited to just your blog posts. Your Woocommerce is a post, your custom post types are posts too. That means if you want to display your products or your custom post types with a customized manner (like with multiple columns), you can do with this plugin.

The first thing you need to do is to install WP Show Posts from here: https://wordpress.org/plugins/wp-show-posts/

After that, activate it and you’ll see WP Show Posts menu at the left menu:
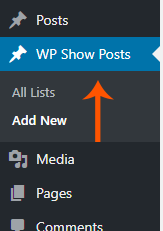
How To Display Posts As Grid Or As List In WordPress 2

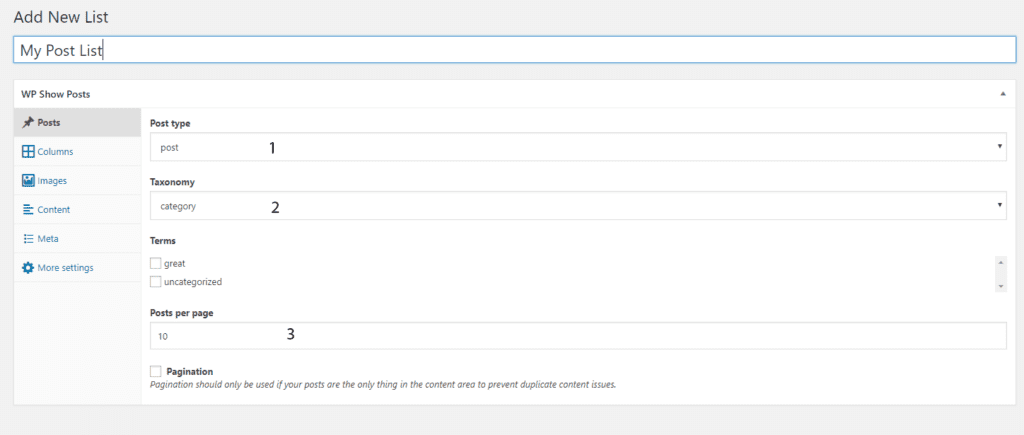
Now, let’s create a posts list by clicking on Add New link under that title. You would see something like this:
How To Display Posts As Grid Or As List In WordPress 3

Click on the number 1 to select the kind of “post” you want to include in the list. As I mentioned above, you can choose your posts, your products or your custom post types here.

On Taxonomy option (number 2), you can select the source of the posts by category or by posts’ tags. If you select category, the list under the Terms title is list of categories. If you select posts’ tags, under Terms would be list of tags.

Number 3, post per page should be self explanatory. That’s the number of posts you want to display per page.

Click on the Columns tab to specify how many columns and their gutter:

How To Display Posts As Grid Or As List In WordPress 4

You can change the number of columns from 1 to 5. Normally, people would choose from 2 to 4, 1 or 5 columns are rare.

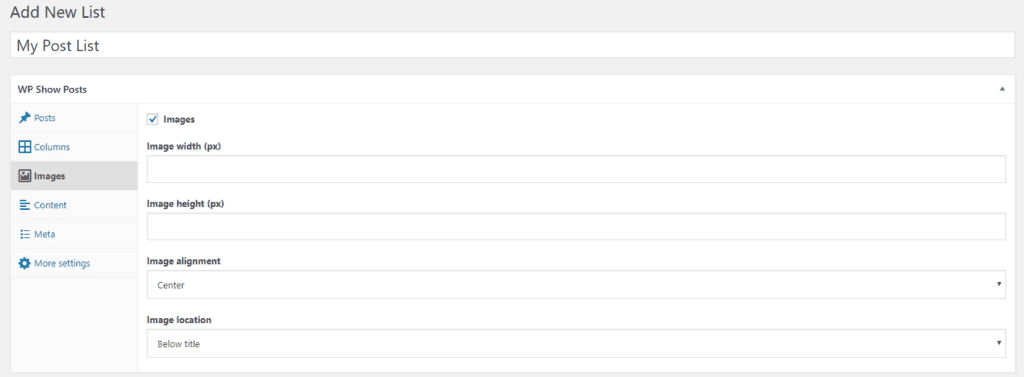
On the image tab, you can set options for the images such as its alignment in a single post, its width and height:
How To Display Posts As Grid Or As List In WordPress 5

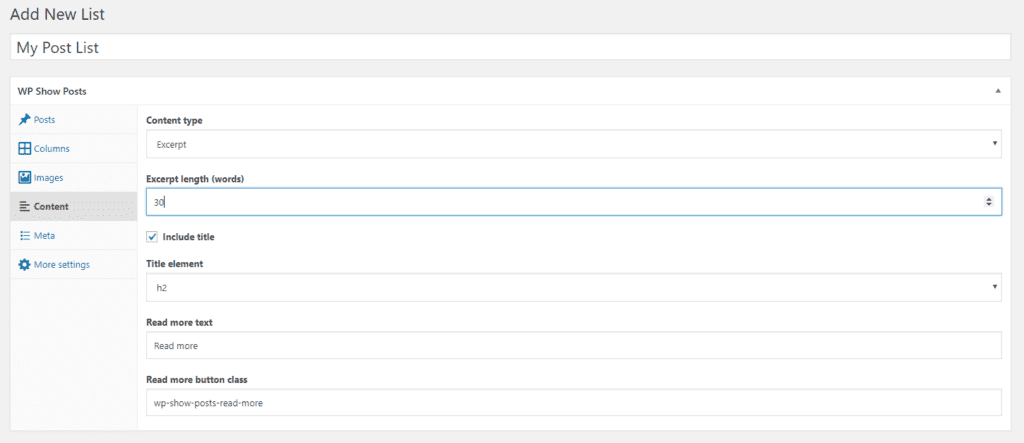
The content tab lets you specify what kind of content will be present in a single listing. Normally, an excerpt is what people use in these kind of lists.
How To Display Posts As Grid Or As List In WordPress 6

The meta tab lets you display additional details about the post such as post author, date of post…

How To Display Posts As Grid Or As List In WordPress 7

Further tweaks can be found in additional settings, which the author of the plugin did a great job to make them self-explanatory.

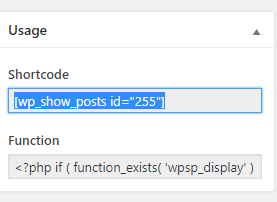
After setting all the options, you can now click on publish to make the list live. You will see a shortcode appears at the bottom right. Copy that and paste anywhere you want to display the list:
How To Display Posts As Grid Or As List In WordPress 8


Now, I’ll create  new post and paste the shortcode. Here is the result:
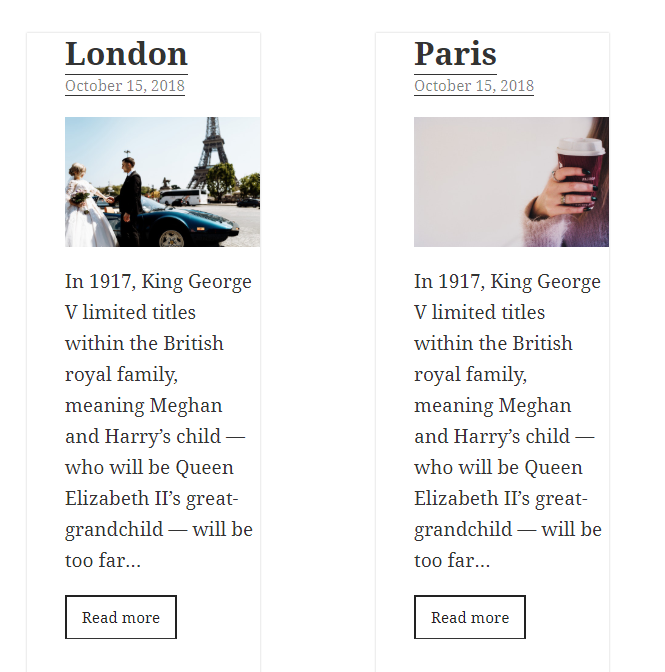
How To Display Posts As Grid Or As List In WordPress 9

Posted on Leave a comment

How To Fix Icon Fonts, Web Fonts Error When Using CDN (MaxCDN, CloudFront…)

How To Fix Icon Fonts, Web Fonts Error When Using CDN (MaxCDN, CloudFront...) 10

Recently, I’ve moved a site for my client from mediatemple to Amazon EC2. The client also wanted to use CloudFront as CDN. Everything worked out great. The site was super fast and the client is was very happy. However, there is one little thing:

How To Fix Icon Fonts, Web Fonts Error When Using CDN (MaxCDN, CloudFront...) 11

If you’ve seen this error before, you’ll understand what it is. It’s a icon font error. Instead of showing the search icon, my client’s site showing that. It didn’t affect the site’s performance but I’m sure no site owner wants that error on her site. It makes the site look broken and unattractive to visitors.

What is the problem?

The problem is very simple. Previously, the icon font files were on the website’s server. The website and the font files were served by one domain so everything worked fine. However, when we used the CDN, the font files are served from the CDN’s domain so the website and the font files are served by two domain.

And, there is a setting needs to be enabled for this kind of setup to work. It is called Cross-Origin Resources Sharing. You can read a very thorough article about it here.

How to fix this error?

The fix is very simple. That’s to enable CORS. We are going to insert these line of text in  your .htaccess file under your domain’s folder.

<FilesMatch ".(eot|ttf|otf|woff)">
  Header set Access-Control-Allow-Origin "*"
</FilesMatch>

You may or may not need to restart apache. It depends on your server’s settings. Since an apache restart is cheap, you’ll do it anyway.

After that, your font icons should appear correctly.

Posted on Leave a comment

How To Create A Poll On Your WordPress Website

There are times you want to create polls on your website to get your visitors opinions on a specific matter. For example, you have released a book and want to know the readers opinion. You would create a poll like this:

What do you think about my recent book?

  1. It’s awesome
  2. I don’t like it
  3. Where can I find it?

Or if you want to find out about the demographics of your blog readers, you will create a poll like this:

What is your job?

  1. Teacher
  2. Police
  3. Firefighter

and so on.

Now, let’s find out how you can create polls like that using free plugin in WordPress.

How to create a poll in WordPress

We are going to use a plugin called YOP Poll which you can download freely on WordPress.org.

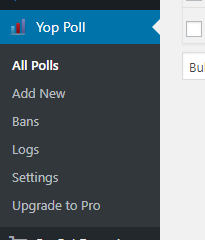
After installing and activating the plugin, you will notice that there is a new menu item on your dashboard.

How To Create A Poll On Your WordPress Website 12

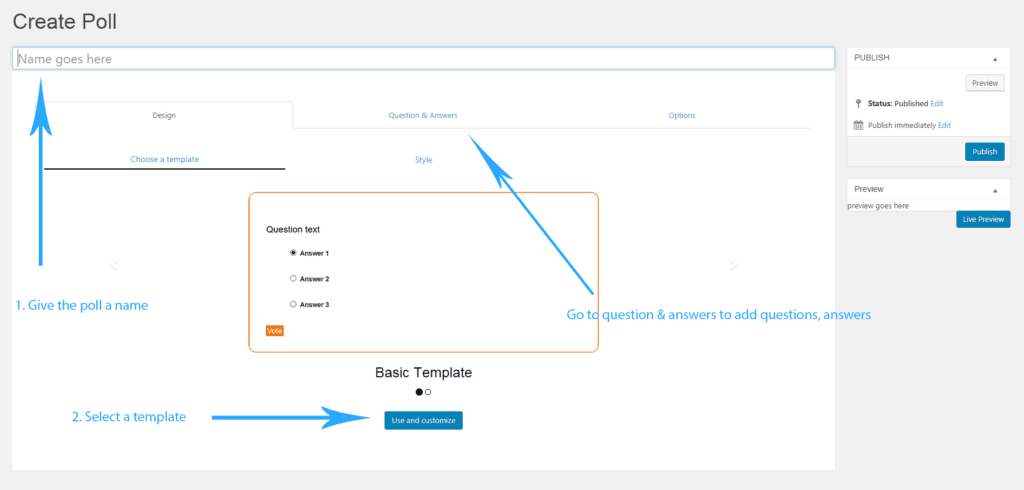
Click on Add new to start creating your poll.

How To Create A Poll On Your WordPress Website 13


How to add questions and answers to the poll

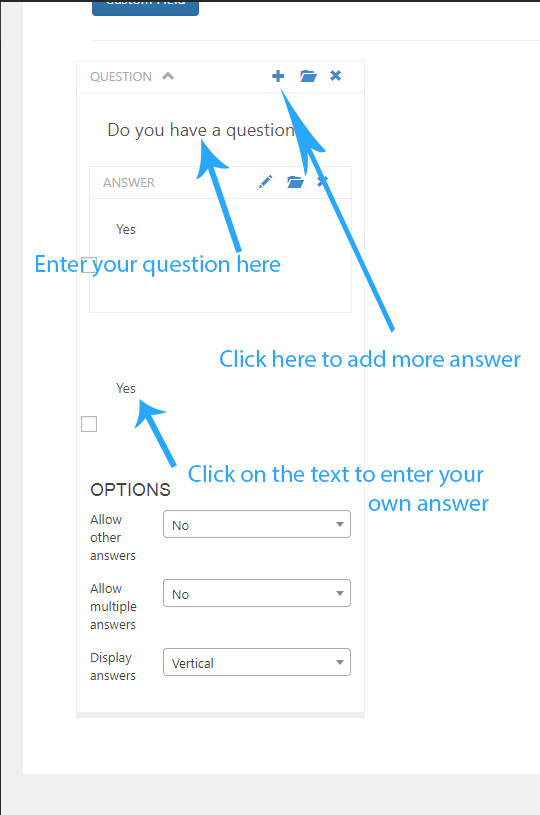
Now, you are in the Question & Answers section, let’s start creating question and answers:

How To Create A Poll On Your WordPress Website 14

After entering your question and answers using the form above, let’s go to the options tab to finalize your poll’s settings. From here, you can change the button’s text and other options such as start date, end date and whether you want to use captcha or not (which I think is a very good setting).

When you are done setting up the poll, click on publish to make it live.

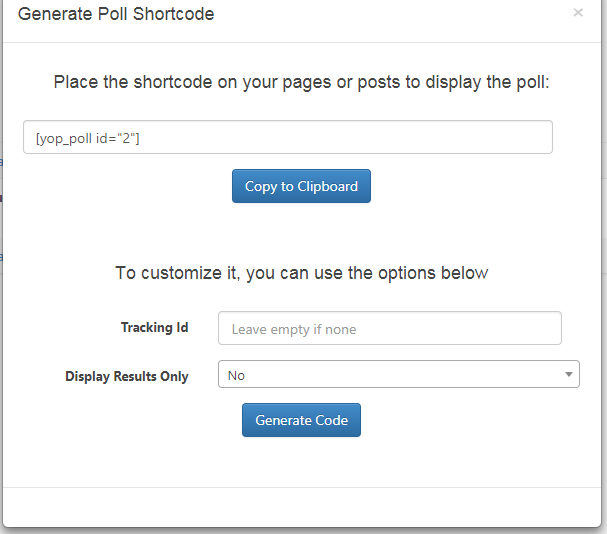
Now, if you go to YOP Poll->All polls, you will see your newly created poll there. To display it on your posts, simply click on the code button to get the shortcode:

How To Create A Poll On Your WordPress Website 15

How To Create A Poll On Your WordPress Website 16


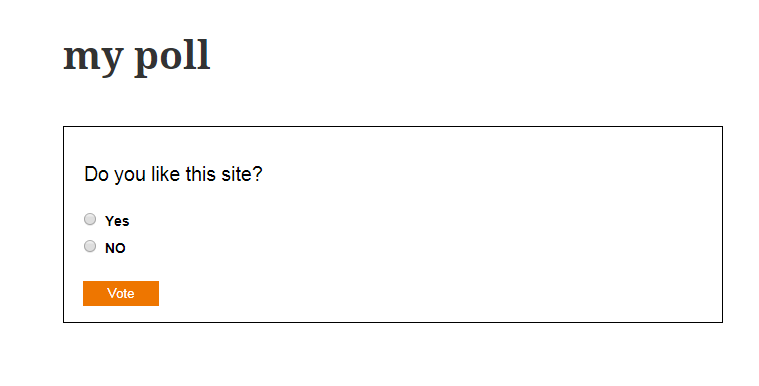
Now you can paste the shortcode anywhere you need to poll to display. For example, I’ll create a new post and paste the shortcode. Here is the result:

How To Create A Poll On Your WordPress Website 17

So, that’s how you create a poll in WordPress. This plugin is very useful for simple poll creation. If you need something more sophisticated such as multiple step polls, you should find a more advanced tool.


Posted on Leave a comment

How To Change The Post Date To Time Amount (x Days/Weeks ago) In WordPress

How To Change The Post Date To Time Amount (x Days/Weeks ago) In WordPress 18

If you have a blog that frequently update, you may want to display the timestamp under the post to the amount of time since the post was written. By default, WordPress displays the date of publish.

How To Change The Post Date To Time Amount (x Days/Weeks ago) In WordPress 19

However, you can change this behavior by using a very simple plugin.

How to change date format in WordPress posts into x days/weeks ago

First of all, let’s go and download this simply plugin called Meks Time Ago here

Now, I assume that you know how to install a plugin to your WordPress website. If you don’t, the tutorials are available from a Google search.

Now you have the plugin installed and activated, if you view your posts now, you will see the timestamp tag under the post has changed to x days/weeks/months ago:


How To Change The Post Date To Time Amount (x Days/Weeks ago) In WordPress 20


If you want to tweak the appearance further, go to Plugins and look for Meks Time Ago then click on the Settings link under its name:

How To Change The Post Date To Time Amount (x Days/Weeks ago) In WordPress 21

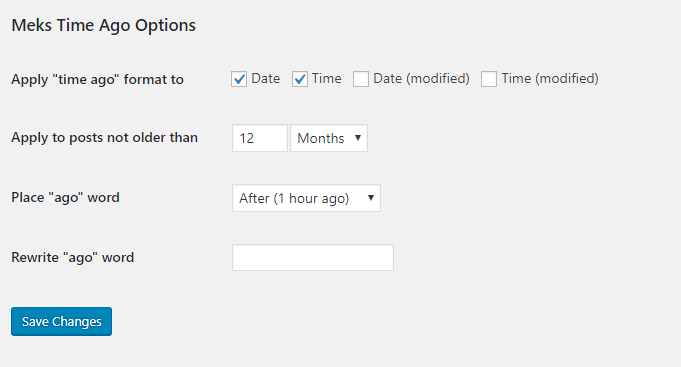
Now you see that the plugin provides quite a few options:

How To Change The Post Date To Time Amount (x Days/Weeks ago) In WordPress 22

By default, the plugin only rewrites the date format to the blog posts which is not older than 12 months. However, you can change this to a much longer period (120 months for example).

You can also change the ago word to something else. This option is to help you display the time tag in a different language. However, I don’t think this is a complete solution. The developer should integrate the translation option of WordPress into the plugin.

You can also set the minimum age of the post to apply the tag.

Improvement suggestions

I think the plugin does a great job converting timestamp under WordPress posts. However, there are some improvements I would suggest to this plugin to make it even better:

  1. Allows users to add icon (like a calendar icon) to the tag
  2. Integrate with WordPress’s site language
  3. When the visitors hover on the timestamp, the exact date appears.

Conclusion

The plugin can use some improvements. However, with the current functionalities, I think it does its job pretty well and a good addition to my list of WordPress plugins.

Posted on Leave a comment

How To Add A Wishlist Button To Your WooCommerce Product With YITH Wishlist Plugin

How To Add A Wishlist Button To Your WooCommerce Product With YITH Wishlist Plugin 23

When shopping online, the wishlist is a important as the cart, maybe more important. The function of the wishlist is to store the items that the customers/visitors want to have but don’t or can’t purchase at the moment. Woocommerce is a great tool to get your online store up and running but it doesn’t come with a wishlist button built-in. Further more, if you want to use the wishlist solution from WooCommerce’s developer, you need to pay for their plugin. Well, if all you need is a tool that:

  1. Allows you to add a Wishlist button to your product page
  2. Displays the wishlist of the shop visitor
  3. Has no limit on how many products your visitors can add to the wishlist

Then a free solution like YITH wishlist plugin is the right choice for you.

How to download  YITH wishlist plugin

The plugin is freely available at WordPress.org here. You can also download it from your admin dashboard.

How to use the YITH wishlist plugin to create your own wishlist

Upon activation, the plugin will create a wishlist button for you. As you can see in the image below, the link called “Add to wishlist” was added to my product page by YITH Wishlist plugin. The link is not fancy but surely it does the job. When you click on that link, that product will be added to the wishlist and there is a link for you to view the current wishlist. Notice that in the free version, there is only one wishlist available. If you want to have multiple wishlists for your visitors, consider upgrading to the pro version.

Now, the plugin is fully functional at this moment. If you are happy with the current result, you can stop here. However, there are some valuable customization you can make the improve the experience much more.

Customizing YITH wishlist plugin

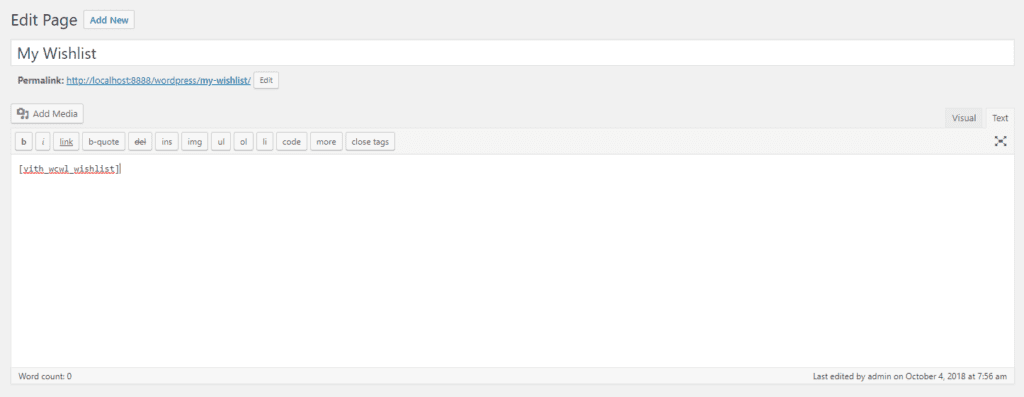
We will start with by how to change your wishlist page. By default, YITH Wishlist Plugin will create a page for you. However, you can create a new page and set it to the wishlist page if you need too. In order to do that, first, create a page with the following content:

[yith_wcwl_wishlist]

As in my case, I created a page (not post) called My Wishlist:

How To Add A Wishlist Button To Your WooCommerce Product With YITH Wishlist Plugin 24

After that, we need to go to YITH plugins->Wishlist (in your dashboard). You will see a section called Wishlist Page. Clicking on the select box to select the page you created with the wishlist shortcode above ([yith_wcwl_wishlist]).

The next time your visitors view their wishlist, they will see that page.

As you can see, creating a wishlist button/page for your Woocommerce store is not hard at all. YITH wishlist plugin offers basic functionalities that fit most of store owner. If you want to improve the wishlist experience further, you may consider getting your hand dirty with CSS/Javascript or hire a developer to customize the look and feel of the button and the wishlist page.