
Contents
Creating contact form is super easy in WordPress. Do a simple search and you can find tons of plugins available with 4.5+ star rating. You think that why do you need another tutorial, right? Well, for most people those plugins will work right out of the box and they can move on doing other important things. For some others, things are not so easy.
Maybe you have followed some tutorials, setup exactly as they said but still, the form doesn’t work. In other cases, you may want to add some tweaking to the look and feel of the form.
Whatever your reasons, my goal is to help you setup contact form for your website from scratch and make it work so you never miss an important message from your visitors.
Let’s get started.
Plugins to use
Before we begin, let’s have the following plugins ready:
- Contact Form 7 (required)
- Easy WP SMTP (required)
- Super simple grid (my plugin, optional if you want to have multiple columns form)
- Recaptcha V2 For Contact form 7 (optional but recommended)
Step 1: Create a contact form with contact form 7
The first step is to create a contact form with Contact form 7. You should have contact form 7 installed and activated for now.
If you look at your dashboard menu on the left, there should be an option called Contact:
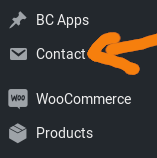
Click on that option, you’ll see contact form 7 screen:
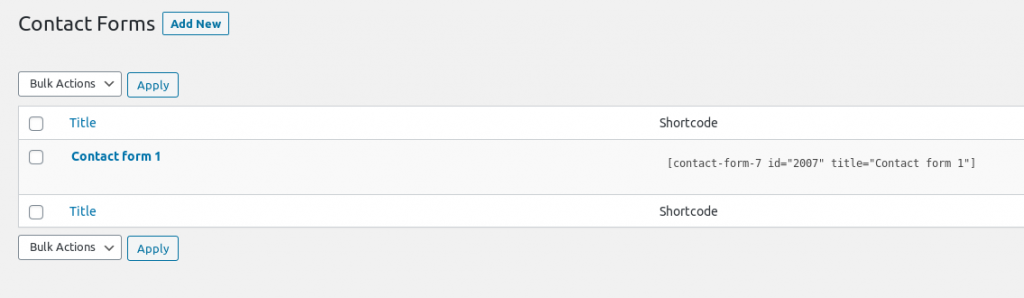
As you can see, there is already a form created for you. Go ahead and delete it as we are going to create a new form.
Click on the add new button at the top to add a new form.
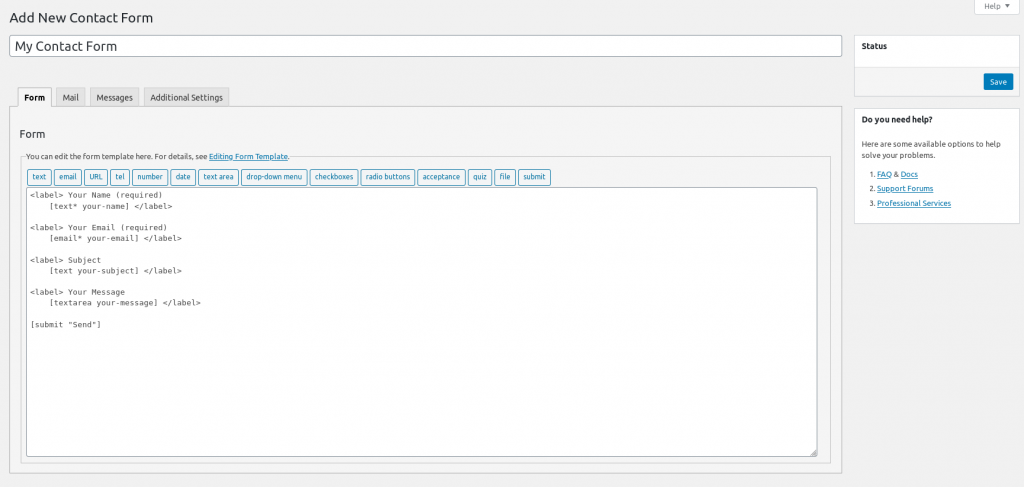
As you can see, there are three main things we are going to do with Contact form 7:
- Enter a form name (nearly the easiest thing)
- Add, remove fields to your form (hardest)
- Click on Save button to save your form (the easiest)
As the form name, you can enter anything you like. In case you need to have multiple contact form, the name should help you tell which for is which.
Now, let’s go ahead to configure the fields of our form.
Normally, a contact form should have the following fields:
- Contact name
- Contact email
- Subject
- Message
However, you can add more fields if you need to.
Contact form 7 support a variety of fields as you can see at the top of the form editor:

As you can see, you can even add radio, checkboxes and even quizzes to the contact form, which is very great.
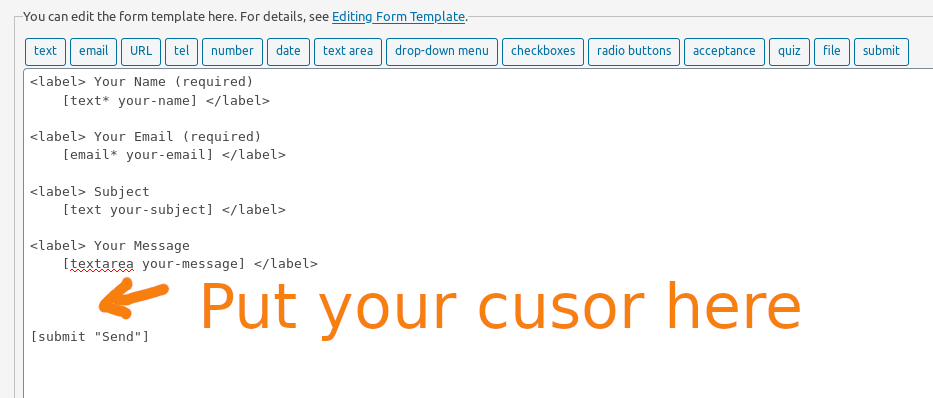
To add any field to your form, first, put the cursor where you want to insert the field, then click on the field you want to insert.
For example, I want to insert a confirmation checkbox below the message box, I click on the space below that message box:
Then, click on acceptance button at the top:

Configure the field before adding to your form
A window will show up for me to configure the field:
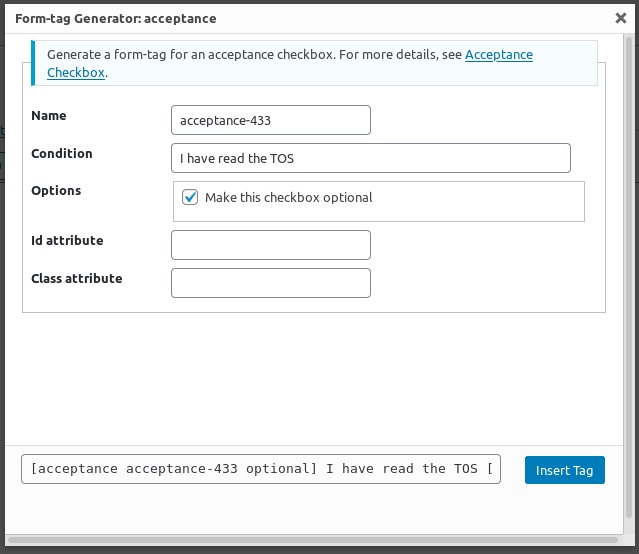
There are a few things you need to pay attention to:
- Name: this should be human readable and it should tell you what the field is about. If you are adding a telephone field (tel), then you should name it tel, phone…
- Id and class: These fields are useful if you want to style them using CSS later. If you are happy with the default, leave them blank.
- Condition: this option is specific to acceptance field only
- Options: This option is specific to acceptance. In other fields, you will have the required checkbox to mark the field cannot be blank when submitting form.
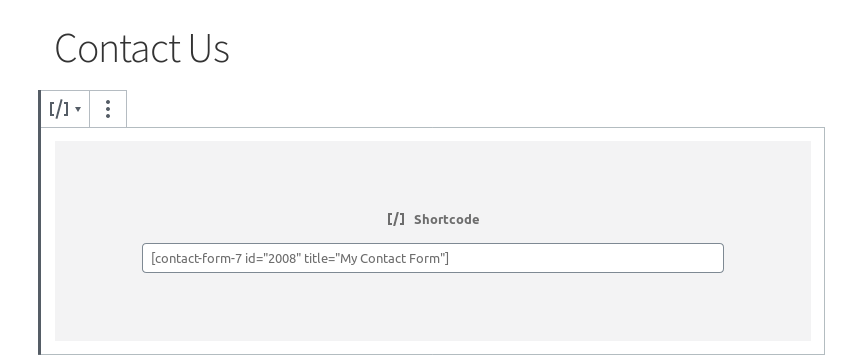
Now, I have the form ready. I’m going to save it. After saving the form, there is a field appears:

This is the shortcode. You can think of shortcode as a placeholder for a, usually, much bigger text. In this case, it’s our form.
This is the code we put in the contact page to display the contact form. Thus, let’s go ahead and put this code in a page.
If you are using Gutenberg editor, you should add a shortcode element first before putting the shortcode:
In case you use the classic editor, you just paste the code in the page’s body.
Let’s publish the page and take a look at our form:
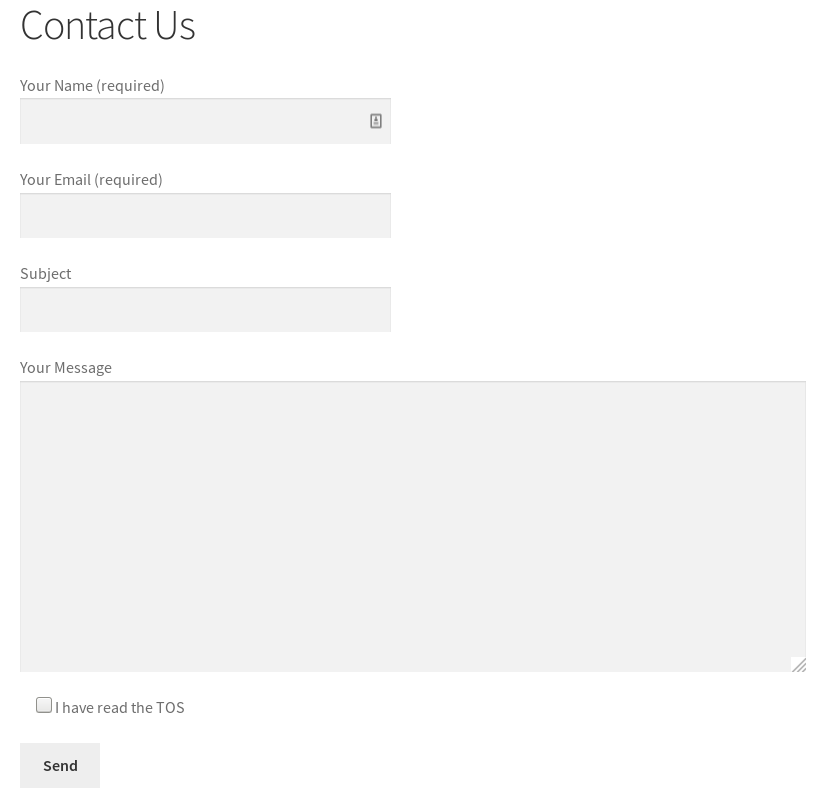
As you can see, the form looks great and it has all the fields as added in contact form 7 form builder.
Step 2: Configure SMTP server to ensure mail delivery
Nowadays, most hosting providers offer mail function out of the box for PHP (the programing language behind WordPress). As a result, many of you may not have any problem get the contact message delivered to your inbox. However, if you have built your contact form, tried to submit a message but still didn’t see anything in your inbox, it’s time to configure your SMTP server.
Don’t worry about the jargons, it is very simple to fix mail sending problem in WordPress as I made a tutorial here:
The tutorial is for WooCommerce but it works for WordPress too.
Step 3: Put your form in multiple columns
Now you should have the form up and running. When someone submit the form, you should get a message in your inbox. That’s great!
However, what if you want to put the form in multiple columns? No worries, I got you covered!
Here is the detailed tutorial on how to put contact form 7 in multiple columns.
Step 4: Add recaptcha v2 to your form to prevent spam
Spam is a serious problem that any site owner has to face today. When you put up a form, you open a door to your inbox for spammer. Thus, adding captcha to your form is a great way to keep your inbox clean.
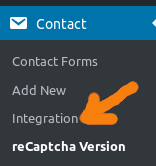
Now, let’s add the plugin Recatpcha V2 For contact form 7 to your site.
After you activate the plugin, you’ll see a new option under Contact form 7 menu:
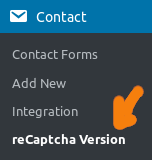
Click on that to start setting up Recaptcha.
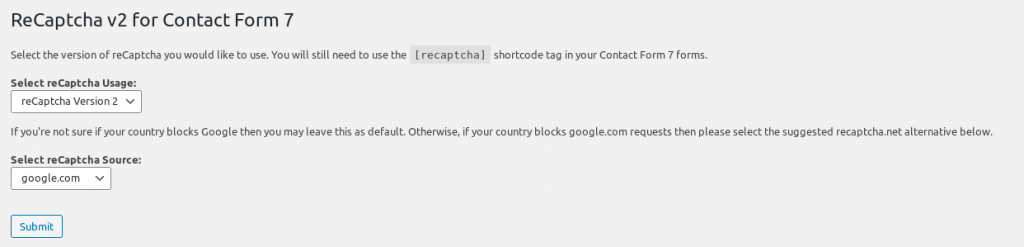
Select the options as in the screenshot and click on submit.
You are done on that screen. However, there in one extra step you need to do to make recaptcha works. That is integrate recaptcha with your site.
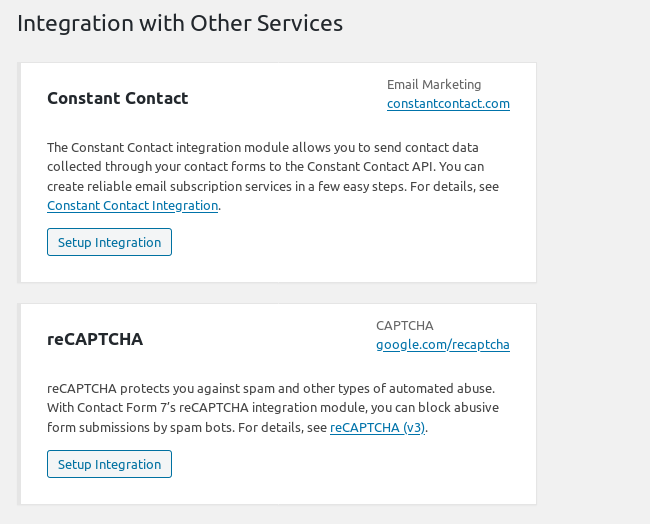
Still under Contact menu, click on Integration:
You’ll see there is a box says reCaptcha. Click on setup integration button in that box to start integrating it to your site:
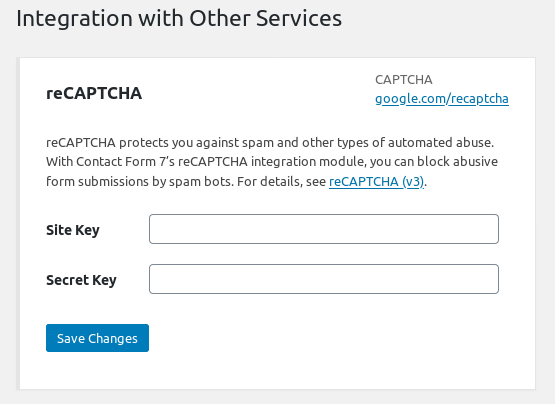
The next screen is where you put reCaptcha keys:
You may wonder, where do I get those keys? Don’t worry, I’ll walk you through that.
First go to this url:
https://www.google.com/recaptcha/admin/create
If you are not logged in to your gmail account, login first and try visiting that page again. You’ll see a screen like this:
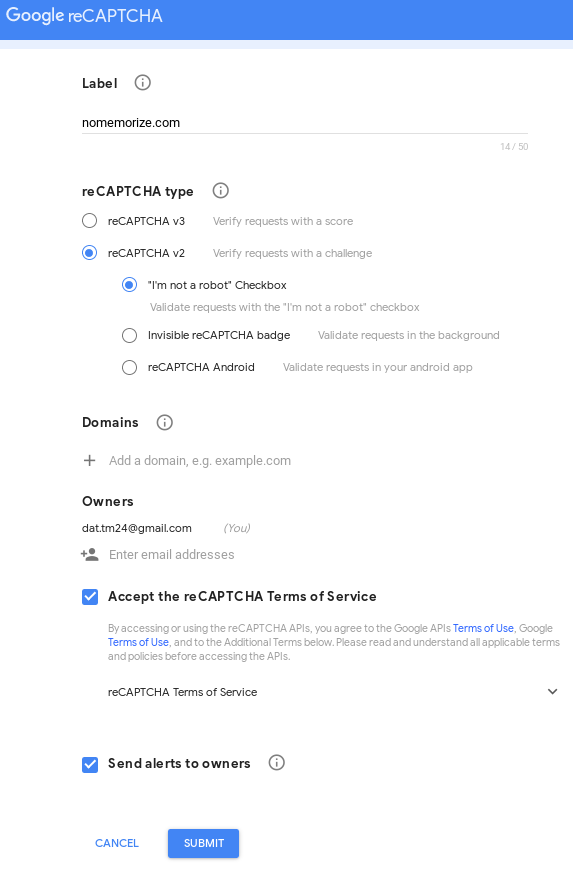
There are two recaptcha options at the time of this writing: v2 and v3. You should select v2, not v3 for this to work.
Make sure you add your domain at “add a domain, e.g. example”
Finally, click on Submit to finalize the process. As a result, you’ll see the keys available in the next screen:

Now, copy them to put in the integration screen on your blog and you are done.
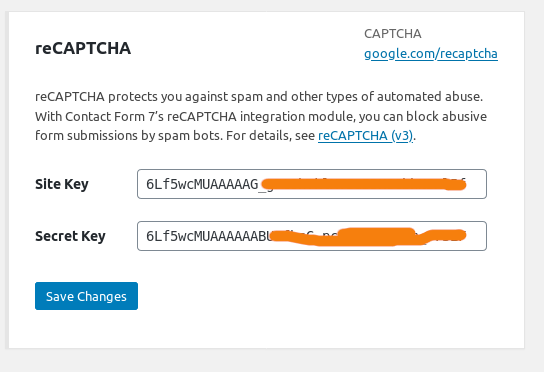
Click on save changes to save the keys.
Now, there is one more thing you need to do. That is putting [recaptcha] tag to the contact form so the captcha will show up.
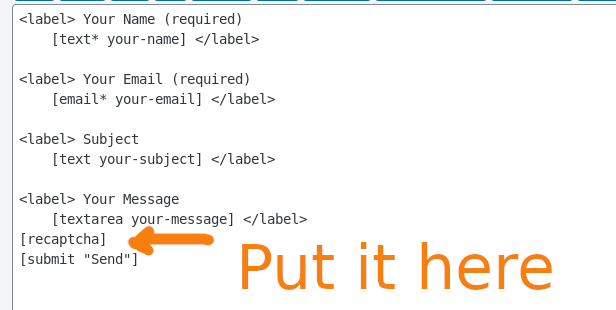
And when I view the form, sure enough, recaptcha box is there:

Conclusion
As you can see, setting up contact form on WordPress could be quite tricky. However, with the helps of plugins, it is much easier to create fully functional contact page. Hopefully the tutorial is helpful to you. If you need further assistance, don’t hesitate to drop me a message.