
Having a weight based shipping fee structure is very common in stores. However, this option is not support by default in WooCommerce. If you want to have weight-based shipping, you may need to use a plugin or you can go without one. However, without a plugin, you need to enter some code in the function.php file of your theme.
Are you ready? Let’s learn how to setup WooCommerce weight based shipping for free!
Some cautions before continuing
To enable WooCommerce weight based shipping, the first thing you need to do is to make sure your products to have weight. It is not a requirement, however, if your products don’t have weight, what’s the point of using weight-based shipping method? Some of your products don’t have weight is OK.
There is another caution you need to know that is which shipping zone is applied when calculating the shipping fee. If you have multiple shipping zones and one zone cover the other (for example, Vietnam is in Asia and you have two shipping zones, one for Vietnam and one for Asia), you need to know that the first shipping zone is applied.
Take a look at this screenshot:

The one at the top will be applied (Asia), not Vietnam 2. If you want to apply the shipping zone Vietnam 2, you need to hold the hamburger icon (underlined red) and drag it to the top position.
Our WooCommerce weight based shipping setup
In our example, we are going to have three weight based shipping tier:
- For packages under 10kg, we charge $10
- We will charge $20 for packages under 20kg (but more than 10kg)
- And finally, for packages over 20kg, we charge $50
There is no limit on how many tiers you can set. You can have very complex tiers hierarchy. It all depends on you.
Setting up the shipping tiers in WooCommerce shipping settings
We are going to create a shipping zone that and three shipping tiers. You can proceed as follow:
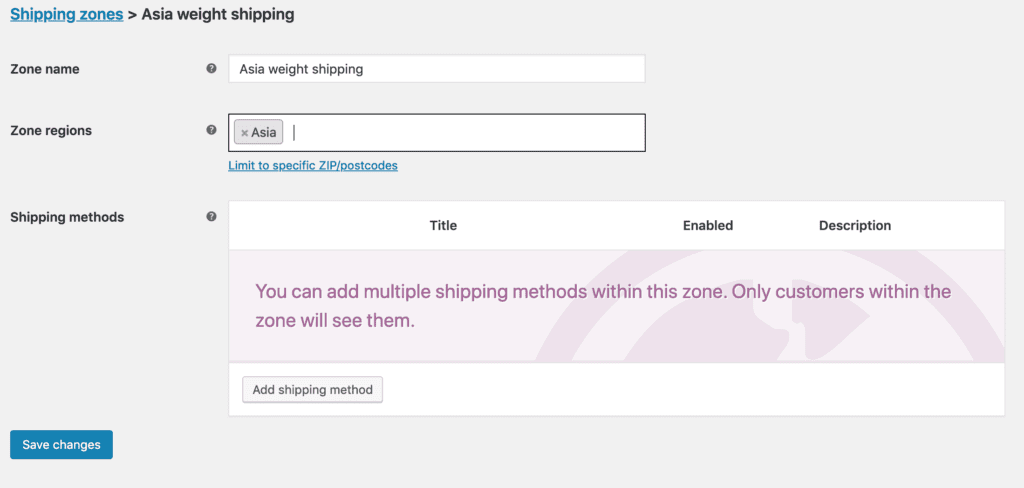
Step 1: Create a new shipping zone by going to WooCommerce->Settings->Shipping zones and click on Add shipping zone. You then enter the name and regions that that you want to use the shipping tiers we are going to create.
Step 2: Create three flat rate shipping tiers
Now you can click on Add shipping method and select flat rate:
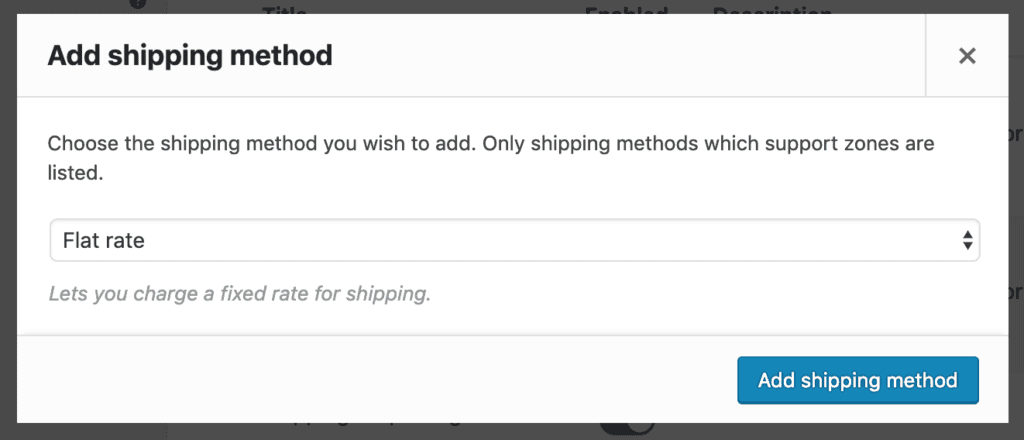
Click on the Add shipping method button. You will see there is an option like this appears. Click on Edit.

Step 3: Now, enter the details for the tier. As mentioned, we are going to create three tiers. In the image below, we create the last tier, shipping fee for packages that is more than 20kg. You can enter anything in method title. Note that this title will be displayed to your customer when they checkout:

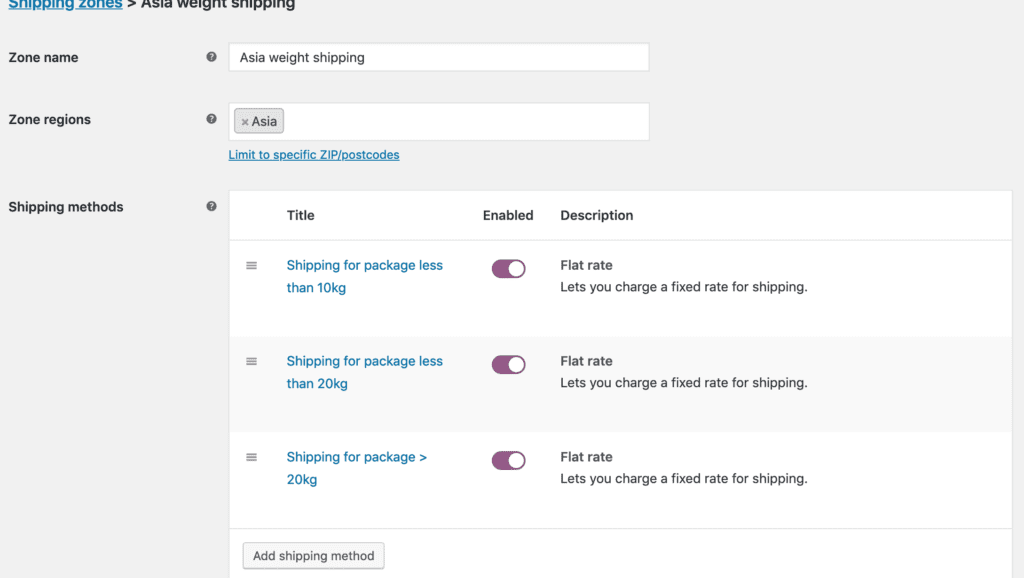
After repeating step 2 and 3 two more times, we have something like this:
Enter a code snippet in your theme’s functions.php
It is recommended to create a child theme and enter the code snippet in the functions.php file of that theme. However, if you just want to see the result, you can paste the code in your current theme’s functions.php file.
Now, let’s go to your theme functions.php file and enter this code:
add_filter( 'woocommerce_package_rates', 'binary_carpenter_weight_based_shipping_tiers', 10, 2 );

function binary_carpenter_weight_based_shipping_tiers( $rates, $package ) {


    if ( WC()->cart->cart_contents_weight <= 10 ) {

    foreach($rates as $key => $value)
    {
      if ($value->cost != 10)
        unset($rates[$key]);

    }

    } elseif ( WC()->cart->cart_contents_weight <= 20 ) {

    foreach($rates as $key => $value)
    {
      if ($value->cost != 20)
        unset($rates[$key]);

    }

    } else {

        foreach($rates as $key => $value)
    {
      if ($value->cost != 50)
        unset($rates[$key]);

    }

    }

  return $rates;

}
See the result in action
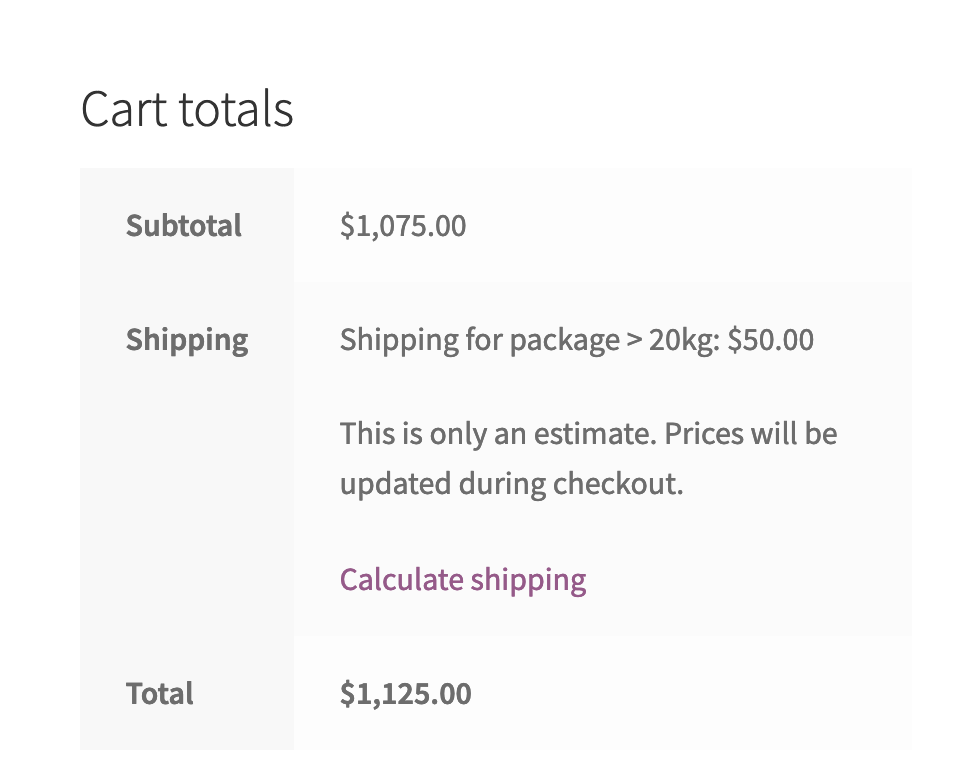
Now, you can add some products with weight to your cart and see the shipping tiers applied. In the example below, my total weight is 270kg and you can see that the highest tier is applied:
Use WooCommerce weight based shipping with local pickup
There are times you would want to add another method, local pickup for example. Then, you can replace the code above with this:
add_filter( 'woocommerce_package_rates', 'binary_carpenter_weight_based_shipping_tiers', 10, 2 );

function binary_carpenter_weight_based_shipping_tiers( $rates, $package ) {


    if ( WC()->cart->cart_contents_weight <= 10 ) {

        foreach($rates as $key => $value )
        {

            if ($value->cost != 10  && $value->method_id != 'local_pickup')
                unset($rates[$key]);

        }

    } else if ( WC()->cart->cart_contents_weight <= 20 ) {

        foreach($rates as $key => $value)
        {


            if ($value->cost != 20 && $value->method_id != 'local_pickup')
                unset($rates[$key]);

        }

    } else {


        foreach($rates as $key => $value)
        {

            if ($value->cost != 50  && $value->method_id != 'local_pickup')
                unset($rates[$key]);

        }

    }

    return $rates;

}
As you can see, in each if condition inside foreach, we check if the method has method_id as ‘local_pickup’. If it has, then we keep that method.
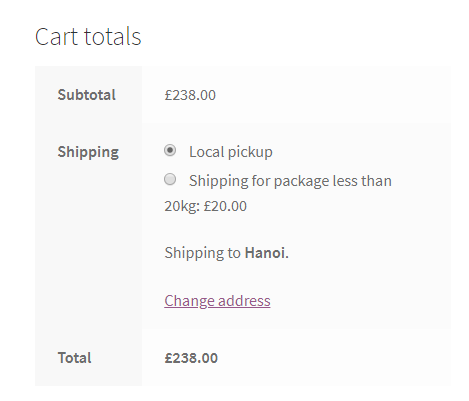
Now, on the cart page, you can see that the customer has another choice for shipping:
Conclusion
As you can see, setting up WooCommerce weight based shipping is quite simple with a little modification. If you find this post useful, please comment and share. Do you think this method can be improved? Please let me know.