Contents
Visual Composer is a very popular plugin to visually create your content. There are many widgets, components in the plugin. In addition, there are other plugins that add more functionalities and widgets to Visual Composer make it the love of many WordPress users.
However, Visual Composer can only be used on regular pages/posts. If you want to use it to create content for your category page, you are out of luck. Visual composer doesn’t support creating content for the category page.
In case you don’t know where to put content on your category, here it is:
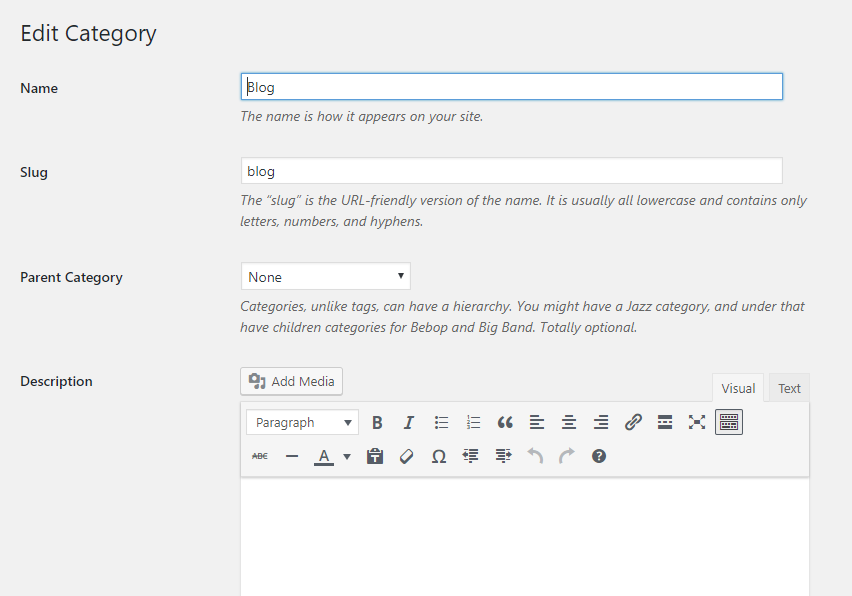
As you can see, there is a text editor for you to put the content, descriptions for the category but that’s it. There is no visual composer editor available.
So, how can you enable visual composer in the category page?
Meet the plan
Our plan is quite simple. Instead of putting the content directly into the editor of the category page, we will create a draft post and then display the content of that draft post as the content of the category page.
Why a draft post?
Because you don’t want your visitor to see this post since it’s not a independent post by itself. The sole purpose of this post is to contain the content for the category page.
As a post, you can use all the features of Visual Composer to compose its content.
Let’s look at a diagram, shall we?

Now, let’s get to the step by step implementation.
Step-by-step to use Visual Composer to create content for your category page
- Create the content of your category page in a regular post using Visual Composer
- Save that regular post as a draft
- Get the draft post’s ID
- Install Display Posts Shortcode plugin
- Find out what theme your site is using
- Create a template file for your category page
- Display the content of the draft post in your category using shortcode
I assume that you are familiar with the steps 1 and 2. Creating a post and save it as a draft are quite trivial so I won’t explain in details here.
Step 3: Get a post’s ID
After creating the draft post, make sure you get the post ID and save it somewhere. You can get the post ID of any post by following the instructions below:
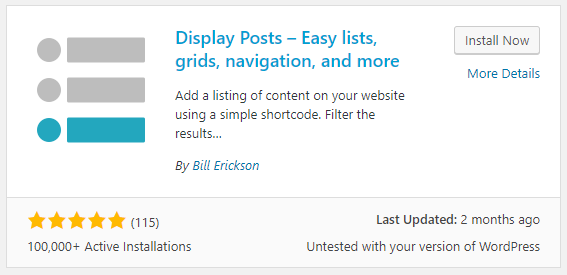
Step 4: Install Display Posts Shortcode plugin
You can navigate to Plugins->Add new and search for this term: Display Posts Shortcode and install the one as in the image below:
Step 5: Find out what theme your site is using
This step is quite simple, please go to Appearance->Themes and you will see what theme is currently active. We need to know this information for the next step.
Step 6: Create a template file for your category page
This step sounds scary for people who don’t know how to code. However, it is very simple. You need to access to your themes folder on your server to complete this step. You can access the files via cPanel or FTP or ssh. Please ask your hosting provider for those details. All hosting providers should have no problem sending you those details.
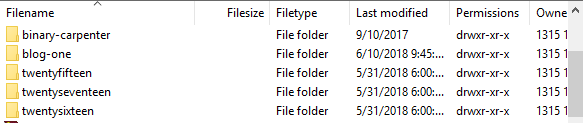
Here I use Filezilla FTP client to access my files. Please go to wp-content/themes on your sever.
In the previous step, I found out that my site is currently using the theme Blog One, I can see the folder of that theme here:
I will click inside that folder to see all the files:
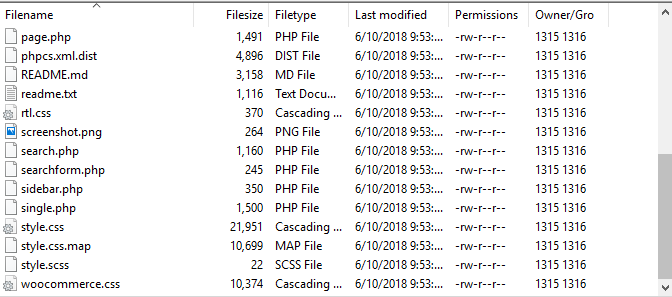
Here, we pay close attention to the one file called single.php. We are going to create a template file for the category using that file.
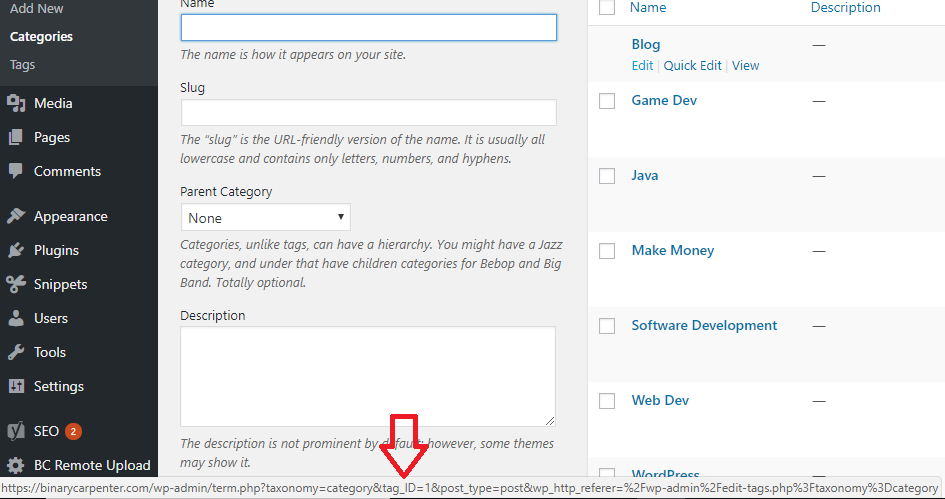
Now, go find your category ID. The method is similar to finding post’s ID.
- Go to Posts->Categories
- Hover on the Edit link of your category
- Look at the status bar of your browser (bottom left)
- Locate the tag_ID value
And that’s your category ID.
For example, my Blog category ID is: 1
Now, copy the single.php file and name it category-1.php (if your category ID is 300, you need to create a file called category-300.php);
If you use an FTP client such as FileZilla, you need to download the single.php to your computer first, then rename the file to the new name.
Open the file with your favorite text editor. On Mac, you have Sublime text. I use Notepad++ since I’m on Windows.
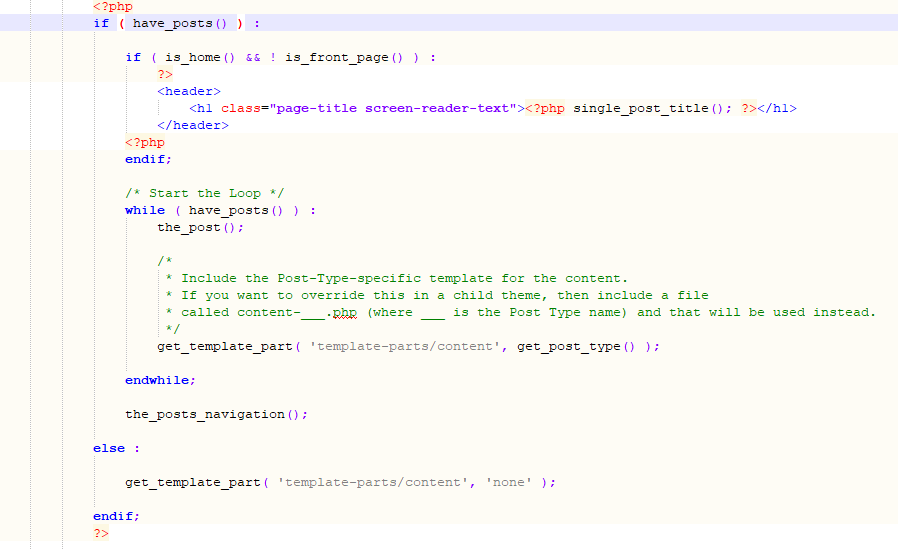
Your file may be a bit different, however, it will look something like that.
Now, we need to remove the content of the file from the <?php to ?> in the image above:
Then, put the following code right at the place where you have just removed the old content:
![]()
![]()
Make sure you replace the your_draft_post_ID with the actual draft post ID you got from above.
Now, upload the file to your theme folder (sample folder with the single.php) and you are done.
Now, what you put in the draft post will appear on your category page.
One last thing, please NEVER publish the draft post.
I hope this post has been helpful. Now you can use Visual Composer to create content for your category page.
Update: You can use this method with any page builder, not just Visual Composer. I’ve made a video here demonstrating how I used Elementor to create and display a custom design for my category page:
![[Solved] Hide WordPress Dashboard Notifications Without Using Plugins](https://www.binarycarpenter.com/wp-content/uploads/2019/12/wordpress-too-many-notices-150x150.png)


Please put the code in the text itself so we can copy it?
You should not copy the code since it’s different from themes.