By default, there are only two parties that get emails when an action is performed in WooCommerce. They are the store owner and the customer.
For example, when an order is placed, the store owner gets one email, the customer get one email.
What if you want to add additional recipients to those emails? Maybe your wife says: “Hey, add my email so I can see how well you are doing”.
Who can refuse, right?
OK, you have your own reasons. No matter what they are, today, I’m going to guide you how to enable WooCommerce additional email recipients.
How to enable WooCommerce additional email recipients
Were are going to need a free WooCommerce plugin for this. Let’s download https://wordpress.org/plugins/wc-multiple-email-recipients/ to get started.
The plugin is very simple and its interface is easy to use.
After you install and activate the plugin, click on the Settings link right below the plugin’s name:
Here is its dashboard:
You can see that there are 5 fields for you to enter additional emails. That’s right, you can’t enter more than 5 addition emails. Most of the time, people are happy with this limit. However, if you want to add more than 5 people to receive your store’s emails (maybe all your family members want to know how well you manage your store), then please let me know. I can do a custom work for you.
Next, you’ll notice a list of checkboxes. Those are the emails that you want to send to those additional addresses. For example, you want to save your wife from those brutal refund notifications. Thus, you will not tick the box at the left of refund emails.
Plugin’s limitations
There you have it: a simple plugin that helps you enable woocommerce additional email recipients. In my opinion, this plugin serves its purposes well. However, there are some limitations:
You cannot restrict what emails are sent to what addressed. Once you enter the email addresses in one of those 5 fields, they will get all the emails that checked.
You only can send to 5 emails
Conclusion
So, what do you think about the plugin? Do you have any suggestions to make it even better? Please leave your comments below.
When I first heard about WooCommerce force sell, I wonder why a store would do something like that? In the end, the customers are the ones who decide what to buy. Why do vendors force them to buy something.
Then I quick realize, many stores sell products together. For example, when you buy a car, buying an insurance policy for that car is a must.
There are still many examples in real life that make you, as store owner, to bundle products to sell together. If you find yourself in such situations, force sell is a good solution.
How To Implement WooCommerce Force Sells
Implementing force sell is quite simple with my new plugin. I call it BC Plus One. I don’t really like the name force sell so I want to name it something more natural. Furthermore, the name makes sense since these WooCommerce force sells products are similar to plus ones of the main product 🙂
Let me show you how it work first then you can see if it’s a good fit for you.
The scenario
Let’s imagine the following scenario. It’s almost winter now (November) but people still want to go to the beach. Thus, they are going to buying something like this:
However, if they only buy this, there is a good chance that they will catch a cold after having a good time swimming and playing. So, it is a good idea to gently remind them that a scarf is a must, to protect them from catching a cold.
It makes so much sense right? Our customers will be touched because we care so much about them.
So, the idea is, when the customers buy the swimwear, the scarf will be added to cart automatically.
How to Setup Plus One Product (WooCommerce Force Sells)
It is super easy to setup a plus one product.
Let’s edit the swimwear, go to linked products:
As you can see, along with upsells and crosssells, you have two new boxes to enter products:
Non sticky plus one
Sticky plus one
What are the similarities and differences between them?
The only similarity between sticky and non sticky plus one is when you add the main product (swimwear) to cart, both sticky and non sticky get added too.
Now let’s talk about the difference between them. Sticky plus one’s quantity is in sync with the main product. That means when you change the main product’s quantity in cart, sticky’s quantity changes accordingly while non-sticky’s stays unchanged.
Sticky products, when added along with the main product, cannot be removed individually. Meanwhile, you can do that with non-sticky plus one without problems.
The final difference is, when the main product is removed from cart, only sticky plus ones are removed.
Sounds confusing? No worries, I’ll walk you through some examples.
We are going to add a non sticky plus one first. Let’s click on the input box at the right of “Non sticky plus one” and start typing the name of the product we want to add (If you select a variable product as plus one, make sure you pick the right variation).
As we need to add the scarf, I’ll start typing scarf into the input box:
Sure enough, you can see the product appears right below. Let’s click on the product to select it and update the main product.
Now, let’s add a main product to cart (the swimwear) and sure enough, the scarf is in the cart too:
Now, if I remove the main product, the plus one product stays in cart since it’s not sticky.
As I mentioned above, if you want the to remove the plus one product along with the main product, add it in the sticky box.
Customize the look of the plus ones products in main product’s listing
Now, let me add another plus one product to the main product. This time, I’m going to make it sticky.
Let’s say after selling the duo a while, some of our customers still catch a cold. Obviously, a scarf is not enough. As a result, I need to add something stronger, a jacket maybe.
Now, if I view the swimwear, I can see there are two products below:
Well, the two products are there but they don’t look very significant. As a result, our customers may miss that part and think we don’t care about their health enough.
How about adding the products’ images, prices and make the products’ title clickable?
All is possible if you go to Binary Carpenter->Plus One:
You’ll find all the nice settings here:
Let’s check all the checkboxes, then click on save settings and go to take a look at our product page again:
Do you think the new listing looks much better? I’m sure you do.
There you go. Does the plugin do what you need? If so, awesome! You can download it here with a small fee. Please remember that your purchase comes with lifetime update and support from me.
If you think the product still needs some improvements, I would love to hear your opinion.
There are a lot of work managing an event, create and sell tickets is one of them. Long gone are the day you have to setup a shop to sell tickets to your fan. Nowadays, you can sell tickets online. Since you are searching for WooCommerce tickets, I can safely assume that you have a WordPress site with WooCommerce installed. Thus, in this post, I’m going to show you how you can setup your WooCommerce store to start selling tickets in less than 5 minutes.
Install plugin to enable WooCommerce Tickets
By default, WooCommerce does not support ticket as a product. Of course you can create a simple product and name it as event tickets but you’ll miss some cool features such as:
Set a start date and end date for the tickets (Events always have a specific date, aren’t they)
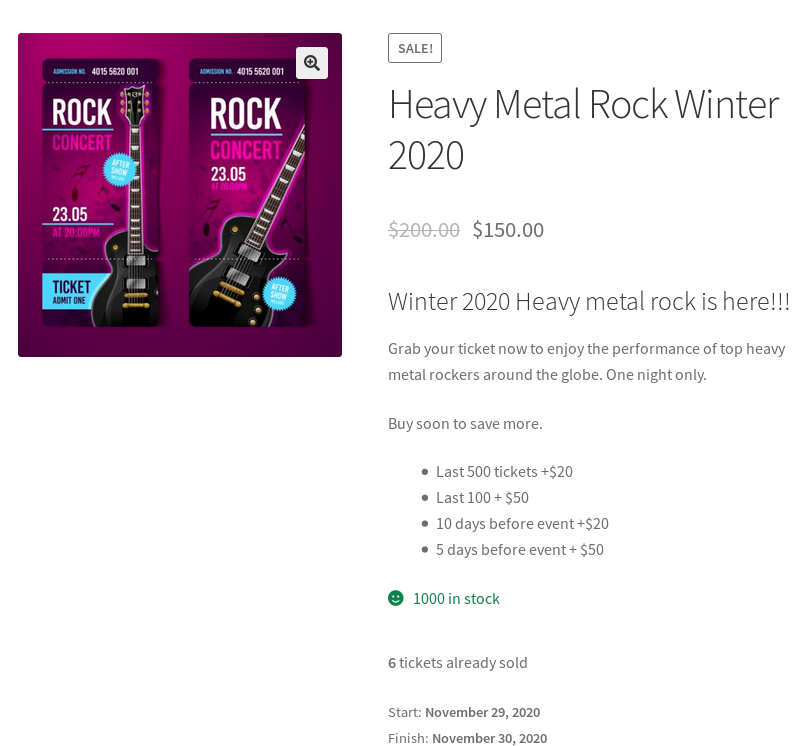
Create scarcity by increase the price of the tickets as it gets closer to the event date or number of available tickets is getting low.
Add a location to your event using Google Map
Disable the tickets after the event expires
Send an email to the customers who purchased tickets about the events and their purchases
All the above benefits are available in this plugin: YITH Event Tickets. It’s a prerequisite for this tutorial to work.
Create WooCommerce Tickets With YITH plugin
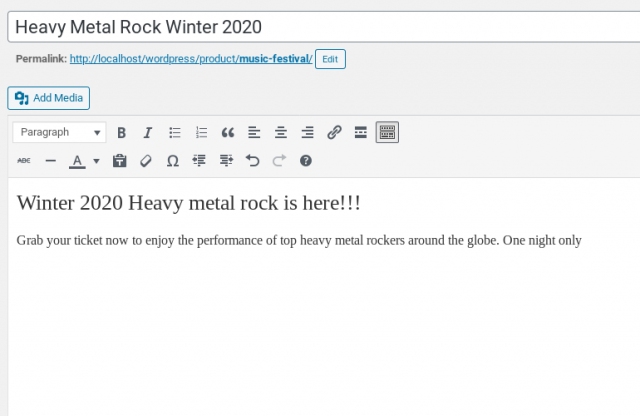
Now I assume that you have the plugin install and activated. Let’s go to Product->Add new to add a new product. Let’s first enter some details about the events and the tickets as you normally do with other WooCommerce products:
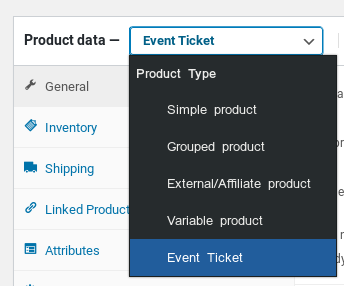
Now, let’s get to the main part. As you might already know that, WooCommerce comes with three default product types: simple, variable, grouped. With the WooCommerce Event ticket plugin installed, you have a new one now.
Let’s go down to the product data section and click on the dropdown right next to it. You’ll see there is a new product type: Event ticket. Let’s select that as we are going to create an event ticket.
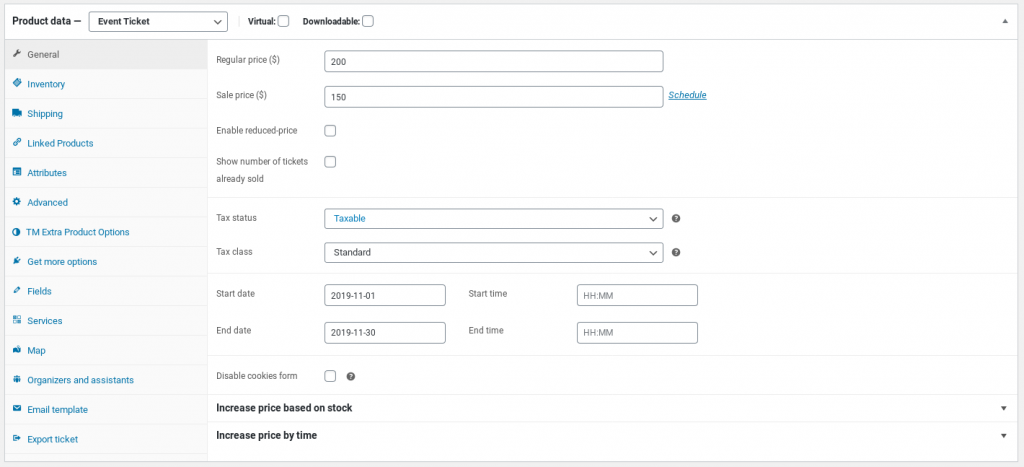
Now, you’ll see there are a lot of options for your to build the great ticket in the General tab:
At this tab, you can set the price for the ticket as usual. In addition, there are field to setup start date and end date. Interestingly, you can set tax status and even apply a tax class to the ticket if you want.
You can notice that there are two bold lines at the bottom of the screen:
increase price based on stock
Increase price by time
I’ll walk you through these two cool options to help you maximize your tickets sales.
In crease tickets’ price based on stock
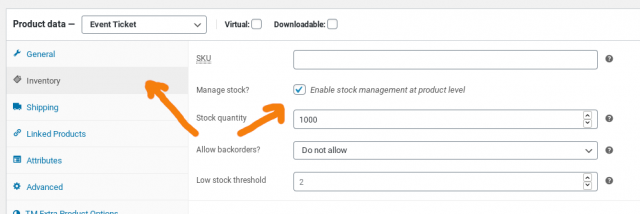
Human are driven by a lot of factor and scarcity is one of the biggest. Thus, showing the fan that ticket price will increase as the stock get lower will encourage them to buy soon. To set this up, first you need to enable managing stock. Let’s click on Inventory tab to start adding tickets to your stock.
First, you need to check the box says: “Enable stock management…”. Then, you need to set a number of available tickets. Now, go back to the General tab and click on “Increase price based on stock”:
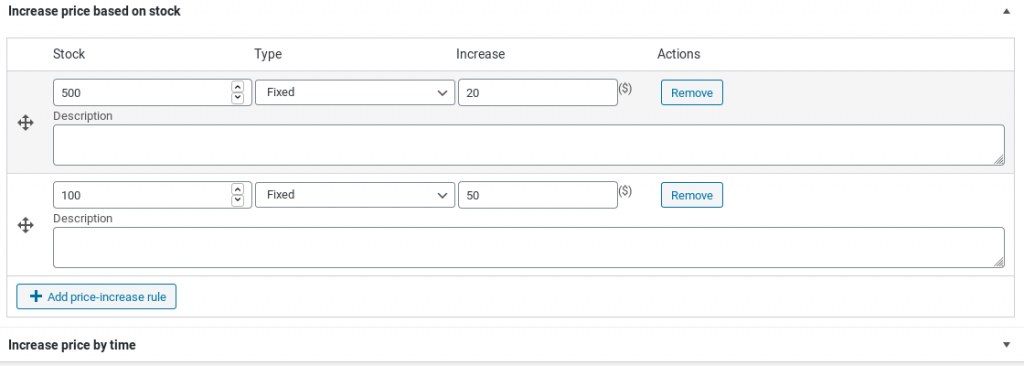
Click on the button “Add price-increase rule” to start configuring your ticket price based on your stock. As you can guess, there isn’t any limit on how many rules you can set. However, I prefer to keep things simple. Thus, here are my rules:
As the stock get lower than 500, I’ll increase the ticket price by $20
If stock gets below 100, I increase the ticket price by $50
Here is the configuration:
Of course, you can set the increase by percentage, not a fix amount.
Increase ticket price by time
Using time as a factor to encourage people to buy the tickets sooner is a good strategy. If you set the price structure so that it will get higher as we approach the event date, people will buy the tickets sooner.
It’s very easy to setup that structure using this plugin.
Click on increase price by time:
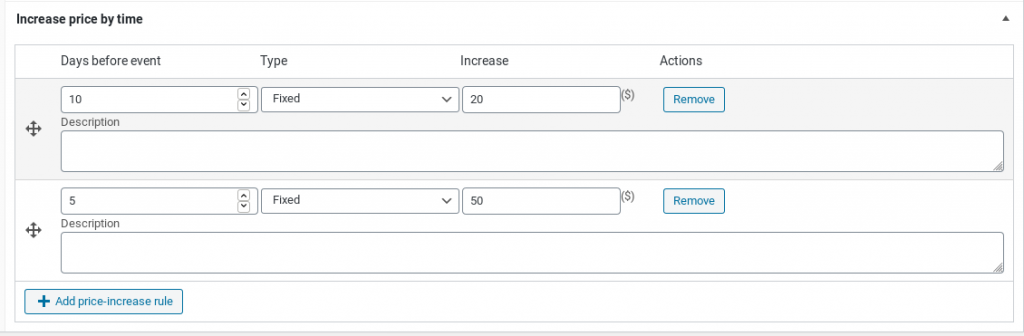
Similar to increase ticket price by stock, you’ll see there is a button for your to add the rule.
Let’s click on that to start adding the rules. Similar to the stock-based price increase, I setup two rules for time:
Now, save the product. The ticket is ready for the fan.
Adding service for the event-goers
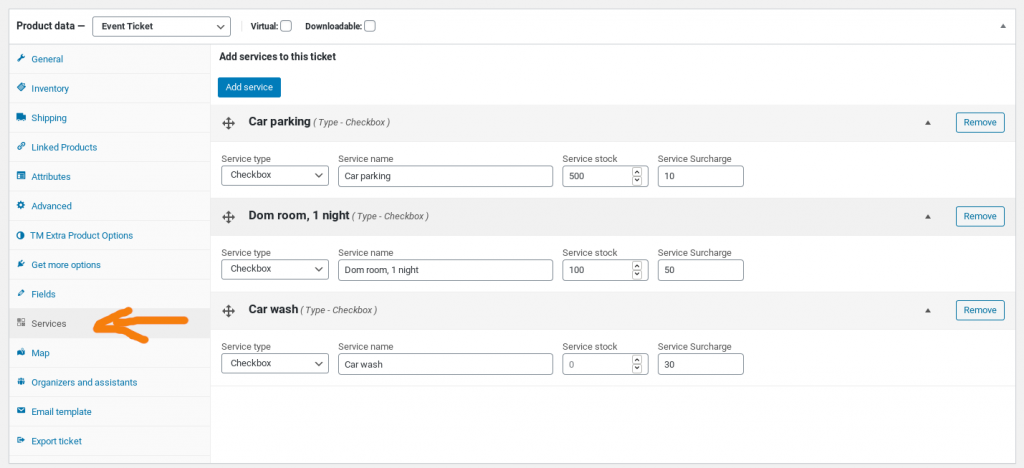
As people go to the event, they may need some extra services such as accommodation, car parking… If you can offer such services, it’s a great chance to earn some more other than tickets sales.
In case you want to add extra services, click on the service tab and start adding your services with their inventory (optional) and price.
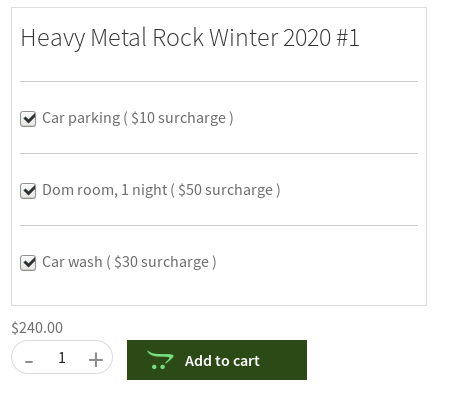
Now, on the product page, the fans can select the service that they need and pay along with the ticket. That’s very convenient!
Take customers’ request by adding fields
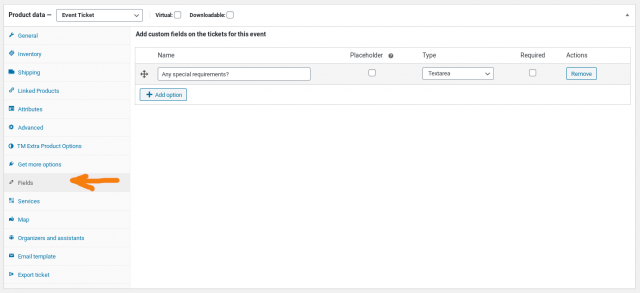
If you want to get the customers requirements, you can easily do so by adding fields to the tickets product page.
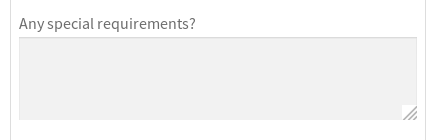
In this example, I added a textarea field so the customers let me know if they have any special requirements. After updating the product, I can see there is a text box appears on the product page:
Conclusion
As you can see, this plugin is quite complete for selling tickets. It lets you create tickets very quickly. In addition, you can even add some extra services to upsell your customers. If it is what you need, you can get it here.
Giving products away is a great way to enhance your customers’ loyalty to your store. For customers that have spent a significant amount of money on your store, they will definitely feel appreciated.
We are going to install a plugin called WooCommerce Give Products to accomplish our goal in this post. The plugin is very simple to use and has quite limited functions. If you need more functions, simply leave a comment below and I’ll consider adding it to the plugin.
Get WooCommerce Give Products plugin
You can get WooCommerce Give Products at WooCommerce following this URL.
After that, let’s install it on your site using the zip file you downloaded. If you don’t know how to install a plugin/theme from a zip file, please check this tutorial.
Send products to user for free using WooCommerce Give Products
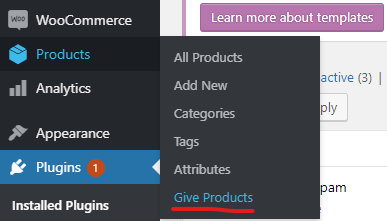
After you activate the plugin, you should see a new menu item under Products called Give Products:
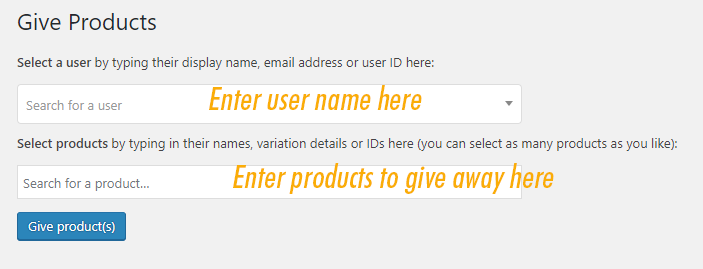
Click on that option to bring the plugin’s interface:
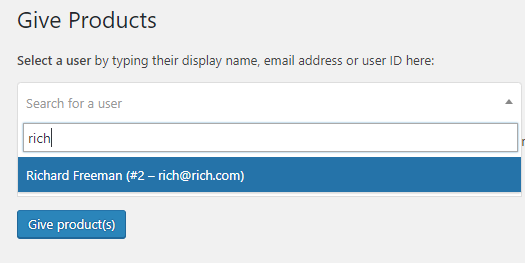
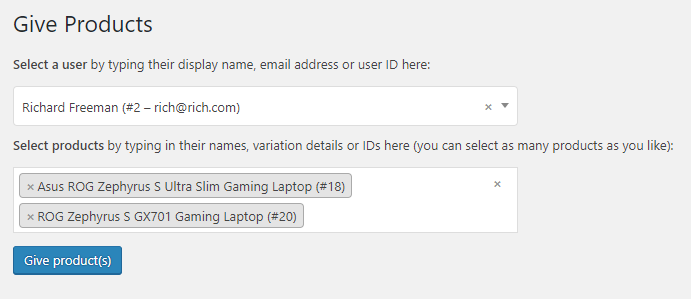
As you can see, there are two fields for you to enter the needed information. In the first box, you need to enter the user that should get the products for free. You can enter her email/name or ID there and there will be a suggestion list for you to select from.
When you are done, simply click on the “Give products” button to send the products to the user.
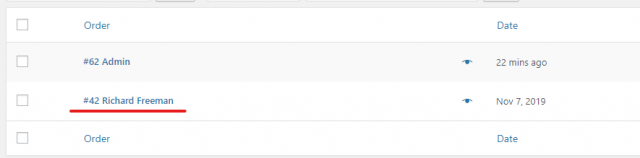
What actually happens behind the scene is there is an order created automatically for you regarding this transaction.
If you go to orders, you’ll see all the details there:
Conclusion
This plugin is very simple. However, it does what it promises. If you need a tool to give away products for your customers, this is definitely the choice. However, there are cases you might want to give a way to not one but many customers at the same time, you might need something else or someone to customize this plugin for you.
PayPal is one of the most popular method that vendors use to accept payments and link PayPal to WooCommerce is simple. In this post, I’ll show you exactly how to do that in just a few minutes.
Install WooCommerce PayPal checkout gateway
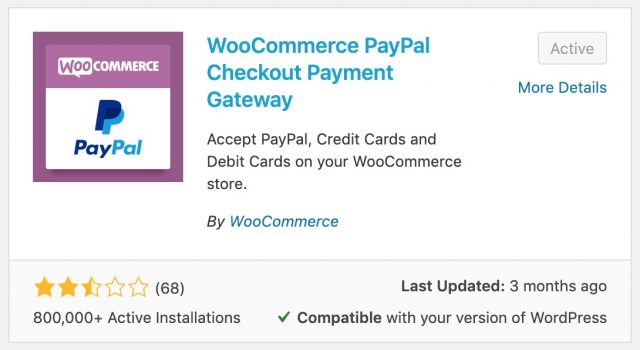
The first step is to install PayPal checkout gateway plugin from WooCommerce. You can see it right away by searching for “WooCommerce Paypal checkout gateway” in plugin search:
It has quite low rating. However, it will serve our purposes well so let’s go ahead and install it. As you can see in the screenshot, I have that plugin installed and activated.
Setup configurations to link PayPal to WooCommerce
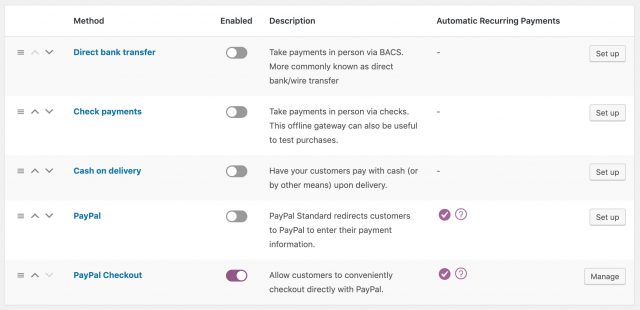
Now you have that plugin installed. Let’s go to WooCommerce->Settings->Payments. You’ll see a list of payments method available on your store here:
There is a method called PayPal Checkout. That’s the one get added to the list thanks to the plugin we have just installed. Click on Manage to start configure PayPal Checkout payment gateway.
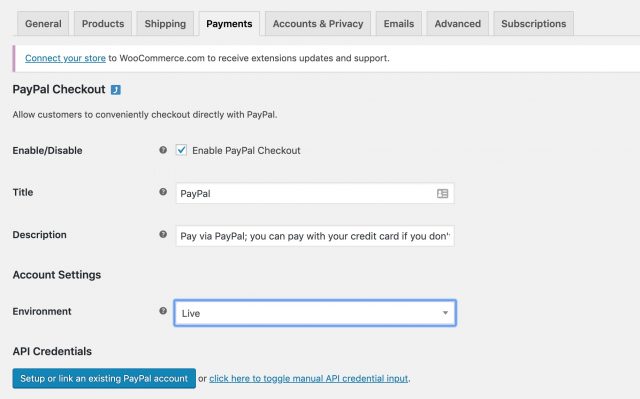
In the next screen, you’ll see this:
Make sure you set the “Environment” option to Live instead of Sandbox. If you select sandbox, you will get no money into your account when someone buy your products.
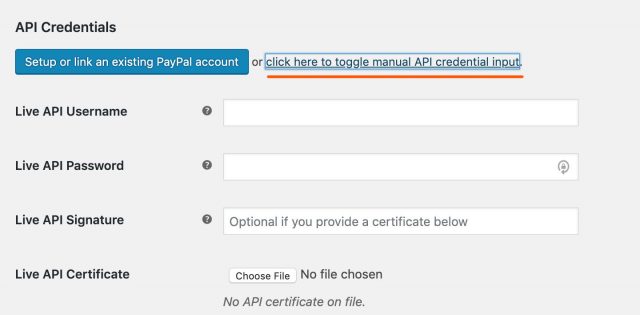
Then, click on “Click here to toggle manual API credential input”. You’ll see three new input boxes appear.
Where do you get the details to enter to those inputs? That’s what we’ll do in the next step.
Get Credentials From PayPal
Now, you need to login to your PayPal account to get the credentials.
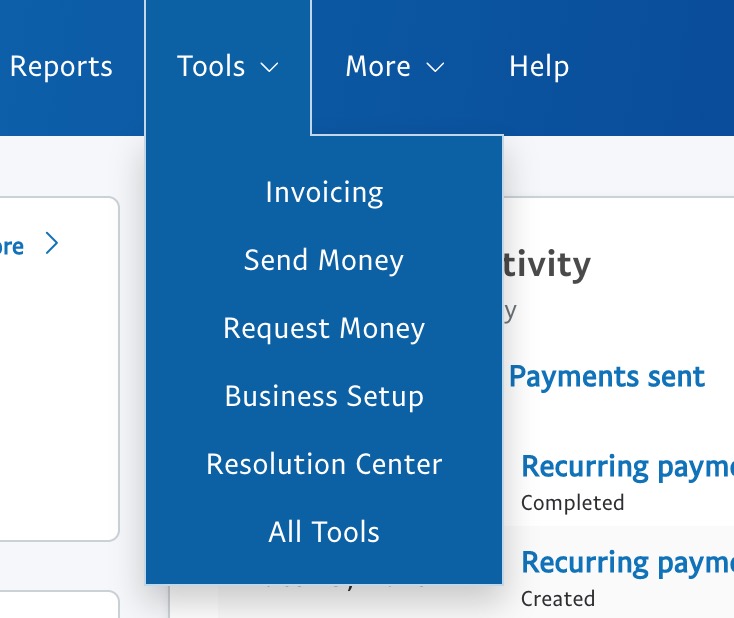
In PayPal dashboard, click on Tools->all tools:
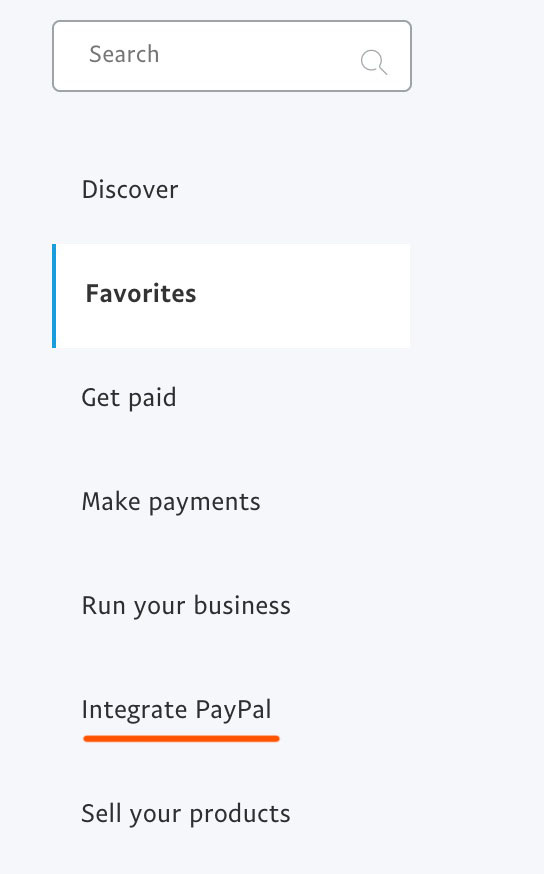
On the next screen, pay attention to the menu on the left and click on Integrate PayPal:
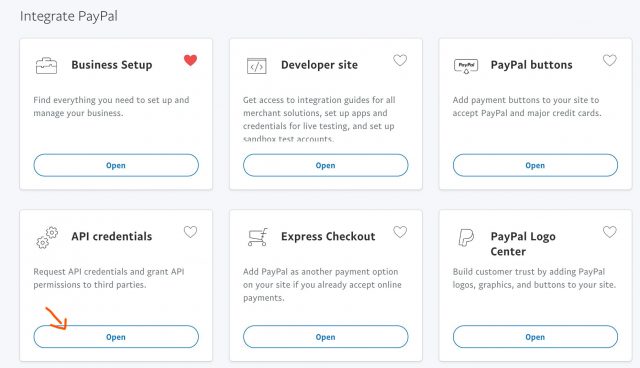
Then, select click Open button in API Credentials box:
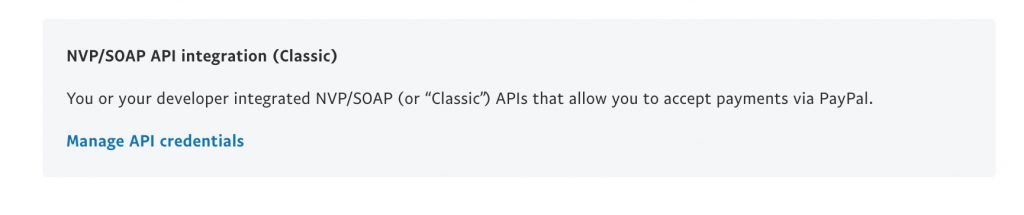
On the next screen, you’ll get three options. Click “Manage API Credentials” in “NVP/SOAP API integration (Classic)”
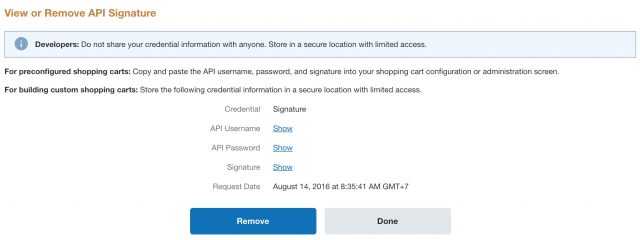
Then, you’ll see the place where you can get PayPal credentials that you can use to link with WooCommerce.
You need to click on the Show link at the right of each field to get the hidden data.
Link PayPal to WooCommerce With the details you get from PayPal
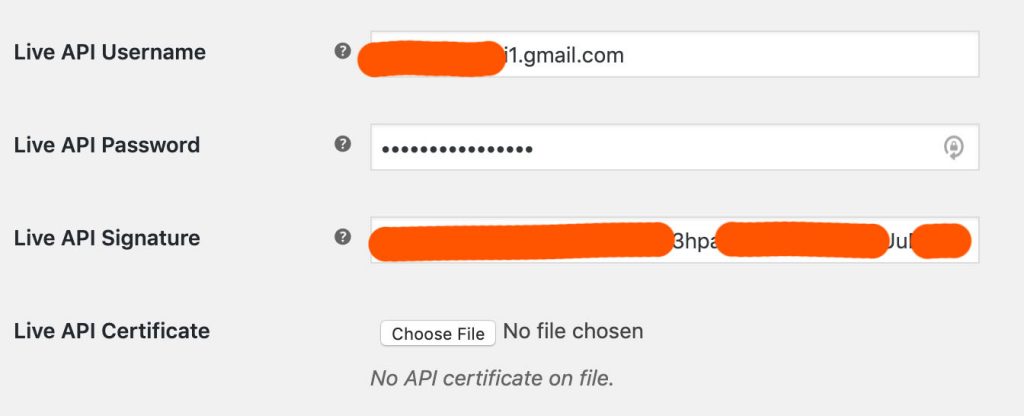
Now, we can finalize our effort to link PayPal to WooCommerce. Head back to your site and put the details from the inputs:
Now, save the settings and your store is ready to accept payments from PayPal checkout.
Integrate PayPal To WooCommerce: Video tutorial
If you prefer watching video, I’ve made one here with step by step tutorial. Please check it out:
Conclusion
As you can see, link PayPal to WooCommerce is quite simple. You may ask that what don’t we use the default PayPal payment comes with WooCommerce (the plugin). The reason is that option is not stable. As I tested a few cases, it failed to accept payments. So, it is best to install WooCommerce PayPal checkout gateway plugin to configure PayPal checkokut.
We use cookies on our website to give you the most relevant experience by remembering your preferences and repeat visits. By clicking “Accept”, you consent to the use of ALL the cookies.
This website uses cookies to improve your experience while you navigate through the website. Out of these, the cookies that are categorized as necessary are stored on your browser as they are essential for the working of basic functionalities of the website. We also use third-party cookies that help us analyze and understand how you use this website. These cookies will be stored in your browser only with your consent. You also have the option to opt-out of these cookies. But opting out of some of these cookies may affect your browsing experience.
Necessary cookies are absolutely essential for the website to function properly. These cookies ensure basic functionalities and security features of the website, anonymously.
Cookie
Duration
Description
cookielawinfo-checbox-analytics
11 months
This cookie is set by GDPR Cookie Consent plugin. The cookie is used to store the user consent for the cookies in the category "Analytics".
cookielawinfo-checbox-functional
11 months
The cookie is set by GDPR cookie consent to record the user consent for the cookies in the category "Functional".
cookielawinfo-checbox-others
11 months
This cookie is set by GDPR Cookie Consent plugin. The cookie is used to store the user consent for the cookies in the category "Other.
cookielawinfo-checkbox-necessary
11 months
This cookie is set by GDPR Cookie Consent plugin. The cookies is used to store the user consent for the cookies in the category "Necessary".
cookielawinfo-checkbox-performance
11 months
This cookie is set by GDPR Cookie Consent plugin. The cookie is used to store the user consent for the cookies in the category "Performance".
viewed_cookie_policy
11 months
The cookie is set by the GDPR Cookie Consent plugin and is used to store whether or not user has consented to the use of cookies. It does not store any personal data.
Functional cookies help to perform certain functionalities like sharing the content of the website on social media platforms, collect feedbacks, and other third-party features.
Performance cookies are used to understand and analyze the key performance indexes of the website which helps in delivering a better user experience for the visitors.
Analytical cookies are used to understand how visitors interact with the website. These cookies help provide information on metrics the number of visitors, bounce rate, traffic source, etc.
Advertisement cookies are used to provide visitors with relevant ads and marketing campaigns. These cookies track visitors across websites and collect information to provide customized ads.