Contents
A navigation menu is not something alien to webmasters today. It’s a must have for any website. In WordPress, menu are created automatically for you the time you set up your site. However, do you know that you can create your own menu, set your own styles for the menu? Sounds interesting? Let’s get started.
Create a menu is super easy in WordPress. Simply go to Appearance->Menus:
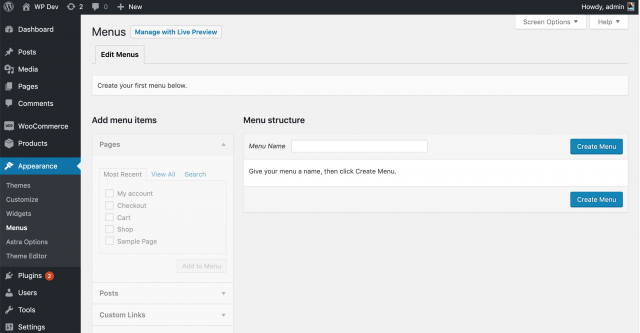
As you can see, I have no menu created yet. Let’s create one.
In the Menu name box, enter the name of the menu. It can be anything. As I’m going to create a primary navigation menu, I’ll call it primary nav.
Now, click on create menu.
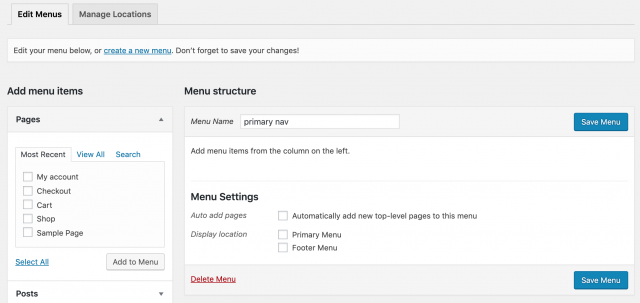
You can see that we have a new menu called primary nav but there isn’t any item on it yet. Let’s add some.
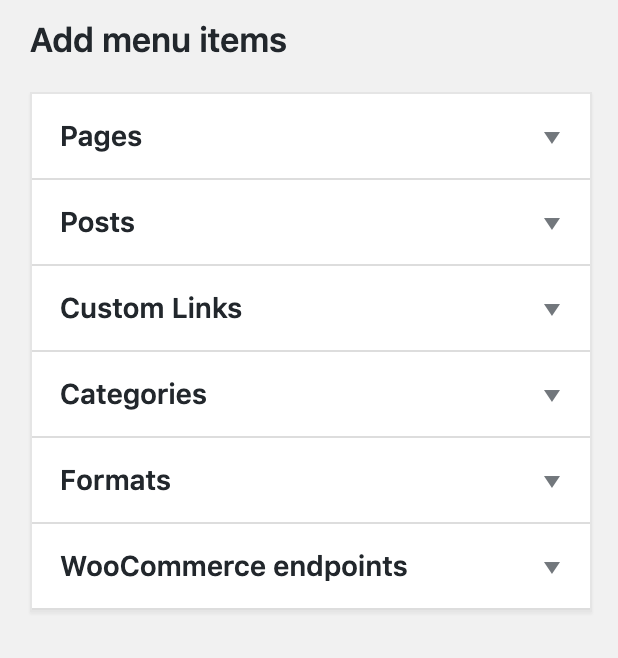
On the left, you’ll see the list of items you can add to the menu:
Click on Pages, for example, you’ll see the list of pages of your site:
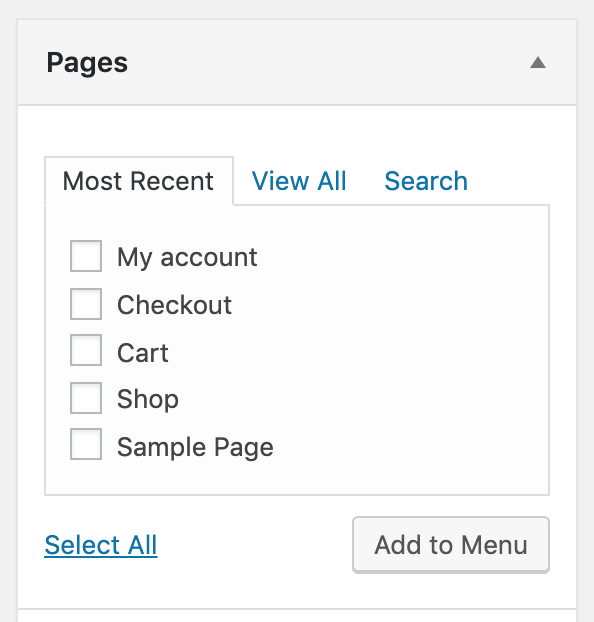
To add any item to the navigation menu, check the checkbox in front of that item and click Add to menu.
There are times you may want to add external links to the menu (pages that are not on your site). It’s super easy to add such links to the menu. Let’s click on custom links:
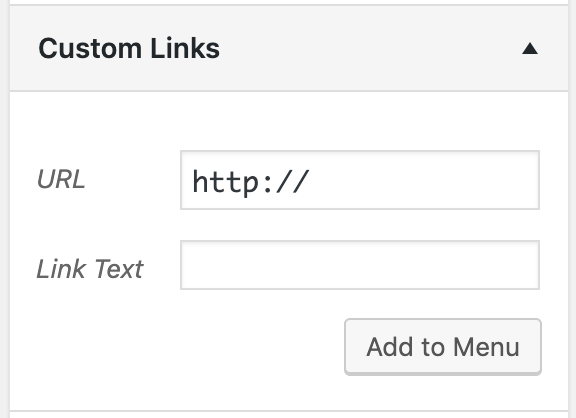
As you can see, there are two boxes for you to enter the details. Let’s enter the URL you want to point to in the URL box and the text you want to display in the Link Text box.
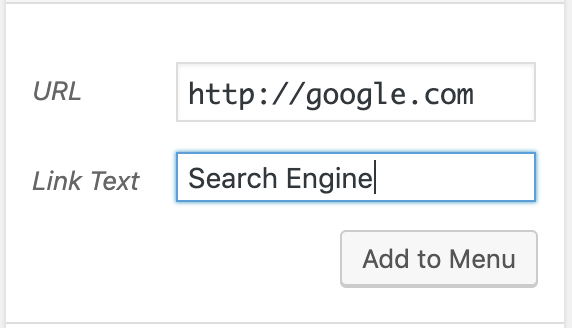
For example, I add a link to Google with the link text “Search Engine”. It’ll look like this:
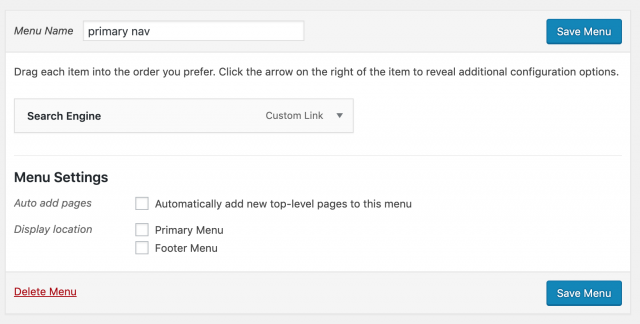
After clicking on Add to menu, it appears on my menu:
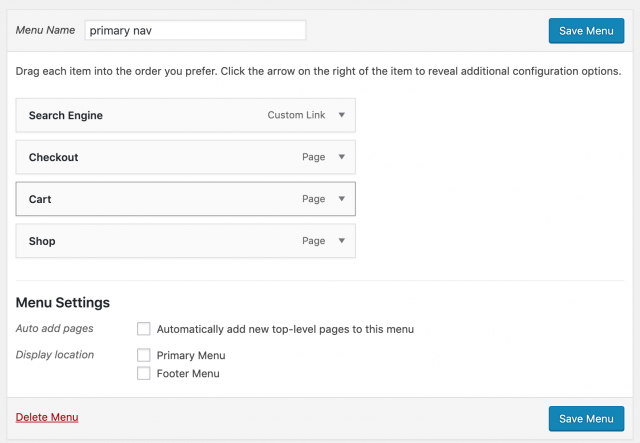
Now, let’s add some other items to the menu to finish the creation of our menu. Make sure you click on the “Save Menu” button to save all your changes. Here is the final version of my menu:
As you notice, the order of items is the order you add them to the menu. First added items appear first and so on. So, does that mean you need to delete and re-add the items if you wan to change the order? Fortunately, not.
You can drag the items up and down to change the order they appear in the menu:
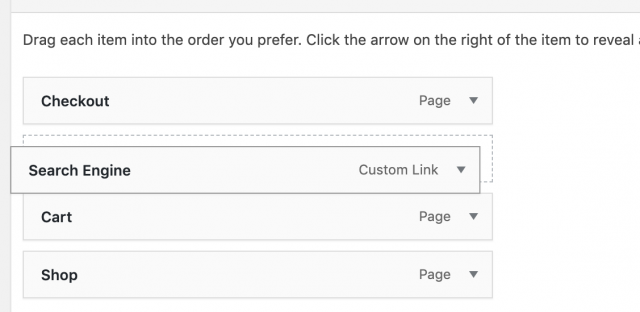
As you drag, you can see that there is a dotted box appear. If you release the mouse, the item you are dragging will fit into that dotted box.
There are times you want to create a menu item that contains other items (children). You can do this by click and drag too. For example, I want to make Cart item is a child of Shop item. I’ll click and drag the cart under the shop (still hold the mouse) and then drag a little bit to the right:

As you can see, the dotted box is aligned a bit to the right of the shop item. That means if you release the mouse now, the cart will be a child of Shop.
You can even drag an item under the Cart item and make that item a child of Cart. There is no limit of the number of levels you can create in your menu.
Make sure you click on Save Menu to save your changes.
If I view my site now, I don’t see the menu I’ve just created. Instead, I may see no menu or the default menu that WordPress creates for me (consisted of all pages in my site). So, how to make the menu appears at the location(s) I wanted?
It’s time to talk about menu locations.
Menu locations are locations that you can display the menu and is defined by your theme.
That means if you use a different theme from mine, you may have less or more locations to put your menu. In addition, the locations may be different.
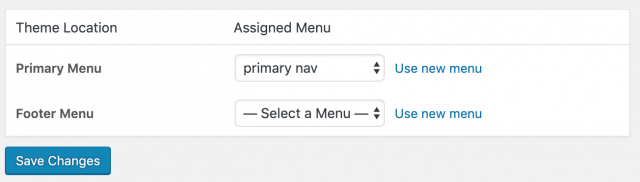
Now, still in Appearance->Menus scree, click on Manage Locations:

As you can see, my theme offers two menu locations, one is Primary menu, the other is footer menu.
Now, each location has a select box to let you select the menu you want to display at that location. The menu I’ve created in the previous step is available in these select box.
Now let’s select it for the Primary Menu location:
Click on Save changes and view the site:
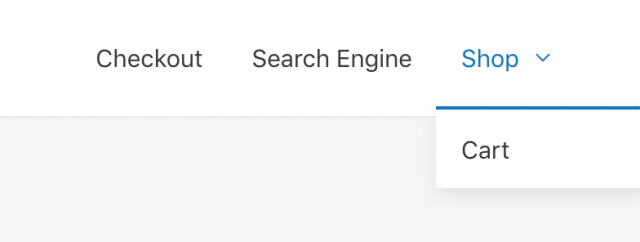
Sure enough, we have the menu at the right place and the Cart item is the child of the Shop item.
Often times, you may need to display a navigation at places that isn’t support by default by the theme. One example is to display the menu inside page, post… If this is what you want, you may need to use a plugin to achieve the result.
There are plugins that available in the WordPress repo. However, they are not supported for quite a long time so it’s quite risky to use them. If you have this need, please let me know and I’ll create one. It should be very simple.
Conclusion
Hopefully you’ll find working with WordPress menu easier now. If you have any suggestions/questions, please let me know.
![[Picture Guide] How To Add MailChimp Optin-Box To Your WordPress Sidebar](https://www.binarycarpenter.com/wp-content/plugins/related-posts-thumbnails/img/default.png)